Wait Until...
Use the Wait Until item to hold a person in a campaign until they meet a condition or enter a segment.
How it works
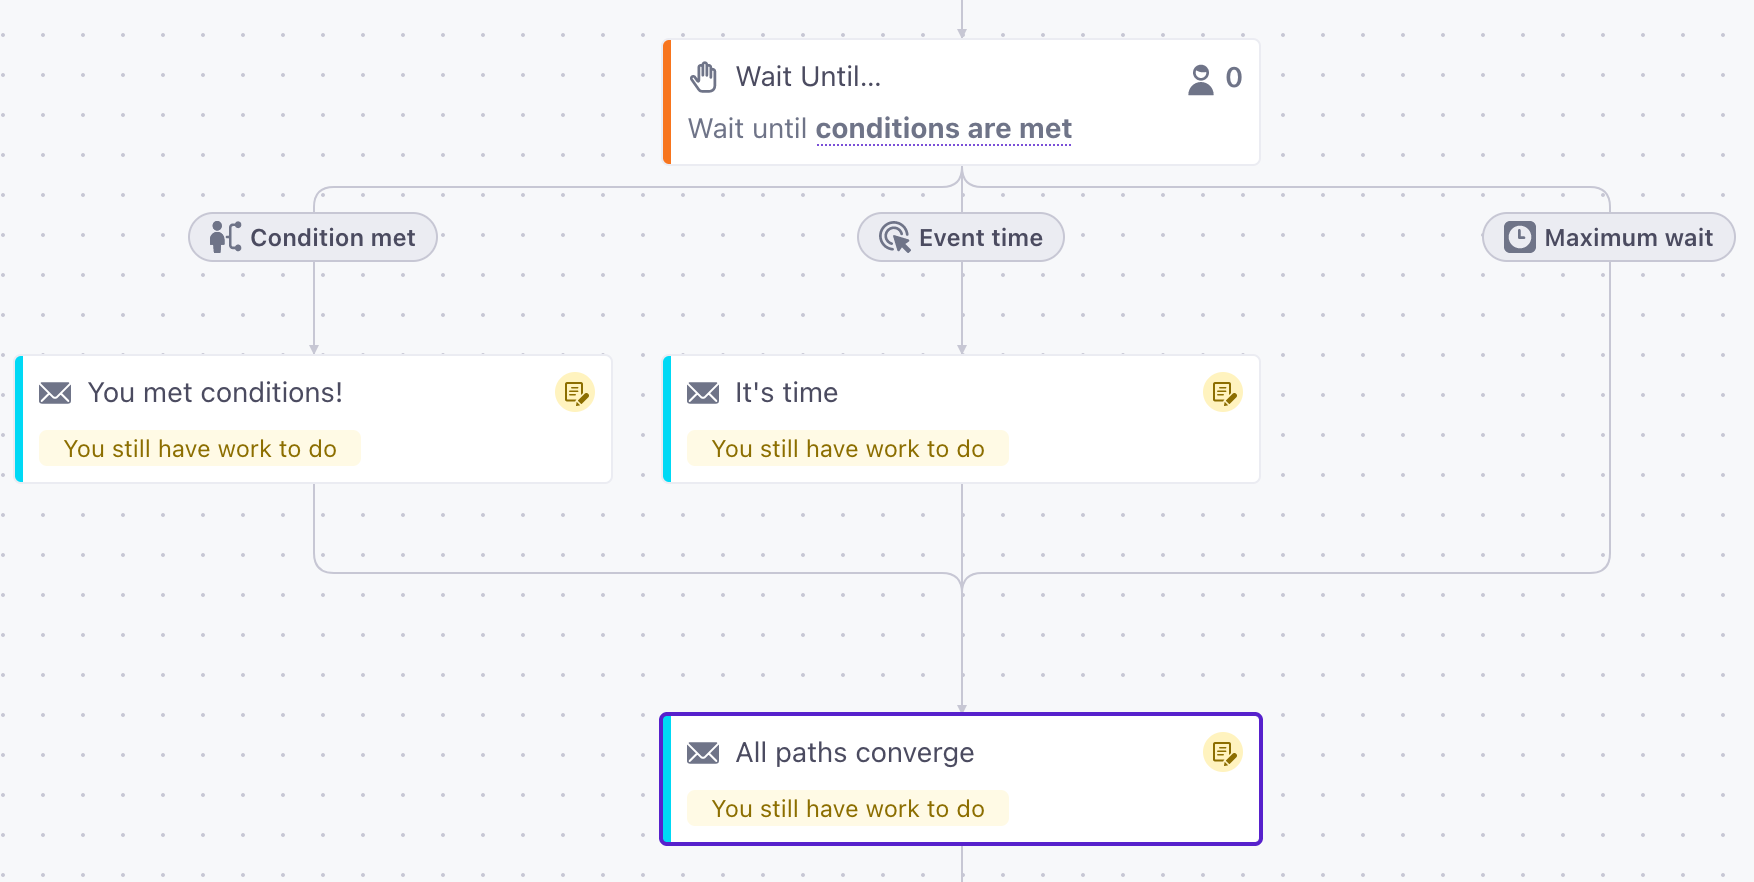
You can set three different types of waits. Each wait type adds a new path in your workflow. A person progresses down the first path they meet conditions for.
- Conditions: Determine whether a person needs to achieve certain attributes, perform an event, join a segment, and so on before they can progress through the campaign. You can set multiple conditions.
- Event time (event-triggered campaigns only): Base your wait on a timestamp in your event data.
- Max. time: Set the maximum time a person can wait. If a person reaches the maximum wait time without achieving any other conditions, they’ll progress through the workflow.
For example, if you set attribute conditions and a max time, a person will progress in your campaign if they either meet your attribute conditions or they reach the maximum wait time.
'Wait Until...' block)-->z z{does the person
already meet conditions?} z-->|no|a z-.->|yes, person skips wait|c a[person
enters wait]-->b{has the person
met a condition?} b-.->|no|d{is there a
max time?} b-->|yes|c[person moves to
the next action] d-->|yes|e{has person waited
for the max time?} e-.->|no, continue waiting|b e-->|yes|c d-.->|no, person waits indefinitely
until they meet conditions|b
People who already meet your conditions will skip the wait
If you set up a wait condition, and a person already meets the condition when they reach the wait, they’ll move on immediately. See Why did someone skip the wait? for more information.
Each type of delay starts a new path
You can set up different types of waits in the same actions, creating multiple paths for people in the journey. A person will progress down the first path they meet conditions for.
You can either take advantage of different paths to send different messages based on the condition(s) the person met. Or, if the result of a conditional wait or a maximum wait is the same, you can place actions after the paths converge.

Set up a Wait Until
- Drag Wait Until… into your workflow.


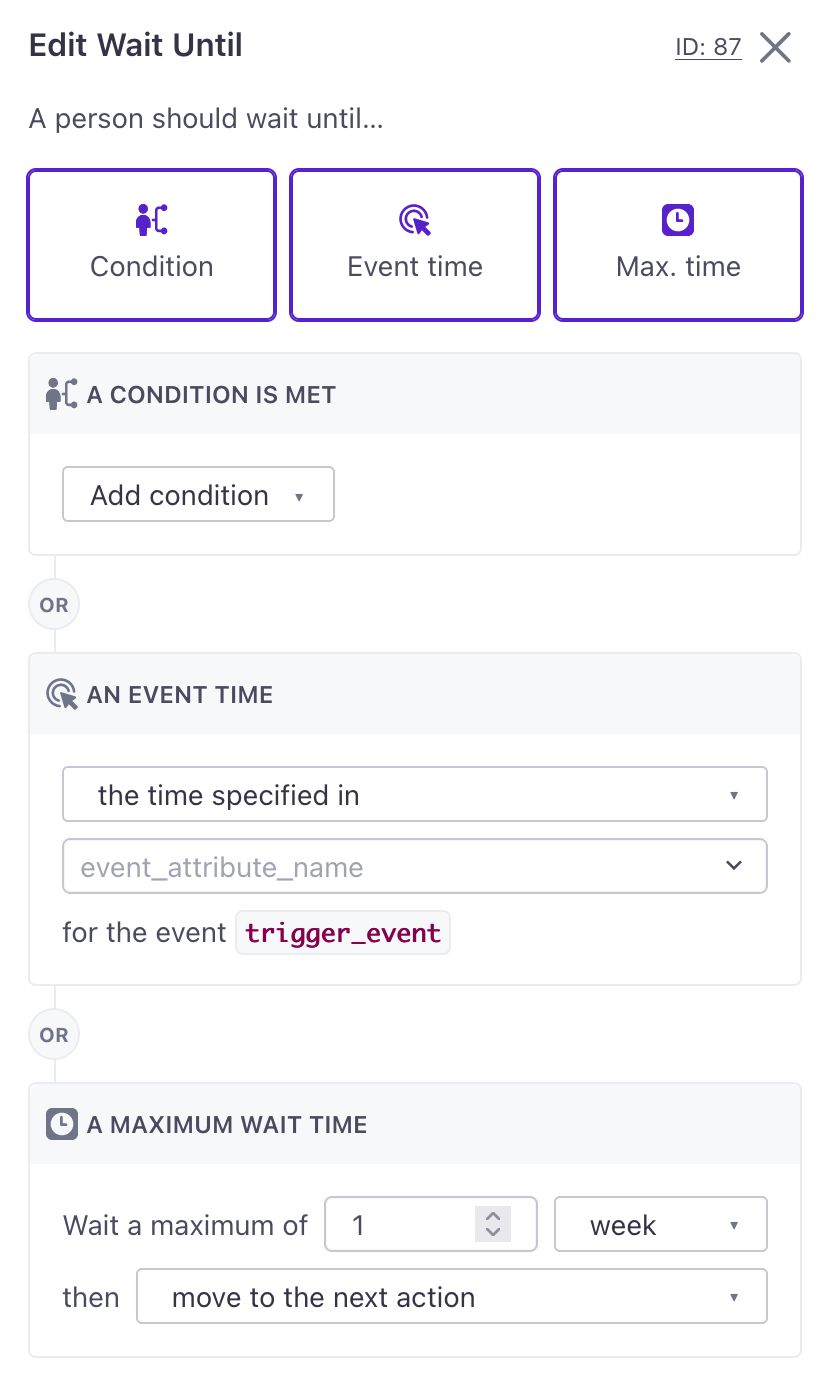
- Click it and determine the conditions a person must meet before they continue the campaign. You can choose one or more types of conditions. However, a person will proceed through the campaign when they meet any of the following:
- Conditions: Attribute, event, segment, or message conditions that a person must meet (or not meet) to move on. Multiple conditions in the same path are joined with And—a person must meet all conditions to satisfy the wait; you can also set up multiple conditional paths (joined by Or).
- Max. time: The maximum time that a person can wait before moving on in the workflow.


Conditions
When you set your Wait until delay, you can use attribute, event, segment, or message conditions. Within a path, can set multiple conditions joined by AND—meaning that a person must meet all conditions to progress down the path.
You can also set multiple conditional paths. See the section below for more information about setting up multiple condition-based paths.
- Attribute: Wait until a person matches a profile attributeA key-value pair that you associate with a person or an object—like a person’s name, the date they were created in your workspace, or a company’s billing date etc. Use attributes to target people and personalize messages. Attributes are analogous to traits in Data Pipelines. condition—whether a person has an attribute, doesn’t have an attribute, matches an attribute value, etc.
- Event: Wait based on whether a person has, or has not, performed an event. Unlike Event time delays, this does not have to be an event that triggered your campaign. You can also specify event properties to narrow down the condition.
- Segment: Wait based on whether or not a person belongs to a segment. See the Not in segment condition for more information about matching folks who aren’t in a segment.
- Message: Wait based on whether or not a message has been sent. You can wait based on other campaigns, transactional messages, etc. For example, if your campaign follows up on a person’s order, you might wait until after they receive a transactional message containing their receipt.
Wait Until event conditions aren’t available in liquid
While you can reference an a different event than the one that triggered your campaign as a wait condition, you can’t use properties from this event later in your campaign with liquidA syntax that supports variables, letting you personalize messages for your audience. For example, if you want to reference a person’s first name, you might use the variable {{customer.first_name}}.. The liquid event context is always the event that triggered your campaign.
Event property conditions
When your Wait Until condition is an event, you can click Add event data filter to evaluate the wait condition based on fields in an incoming event. You can even evaluate properties in your condition against a person’s attributesA key-value pair that you associate with a person or an object—like a person’s name, the date they were created in your workspace, or a company’s billing date etc. Use attributes to target people and personalize messages. Attributes are analogous to traits in Data Pipelines. or the trigger event’s properties. This helps you fine-tune the paths people might take in journeys.
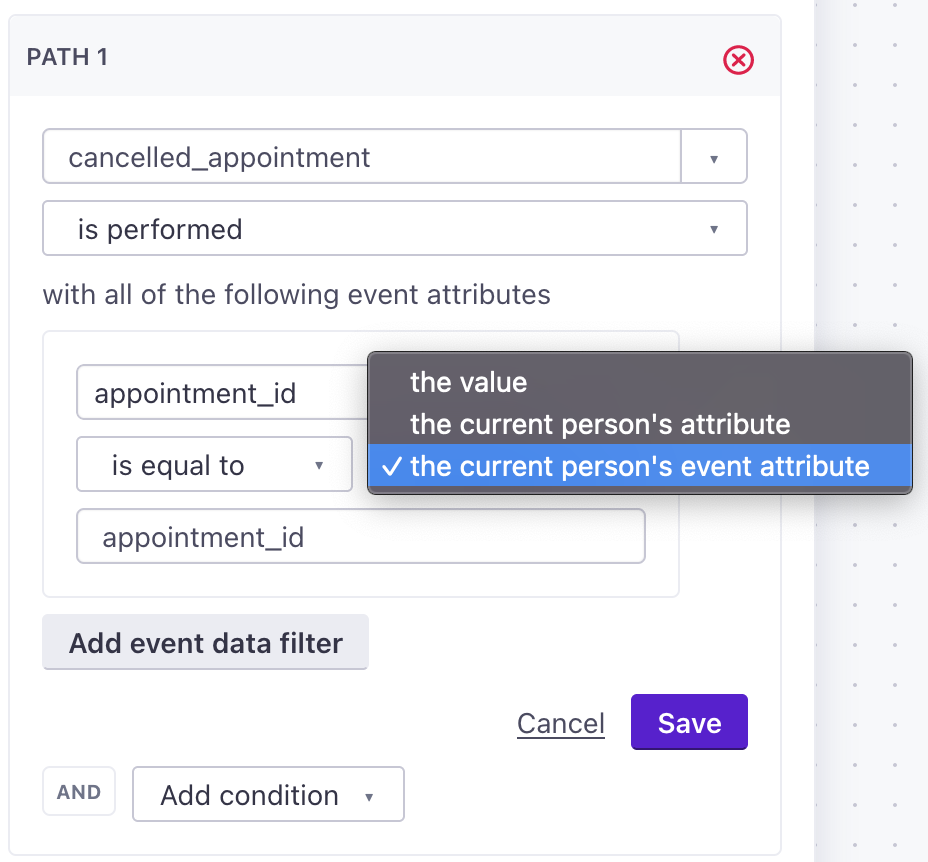

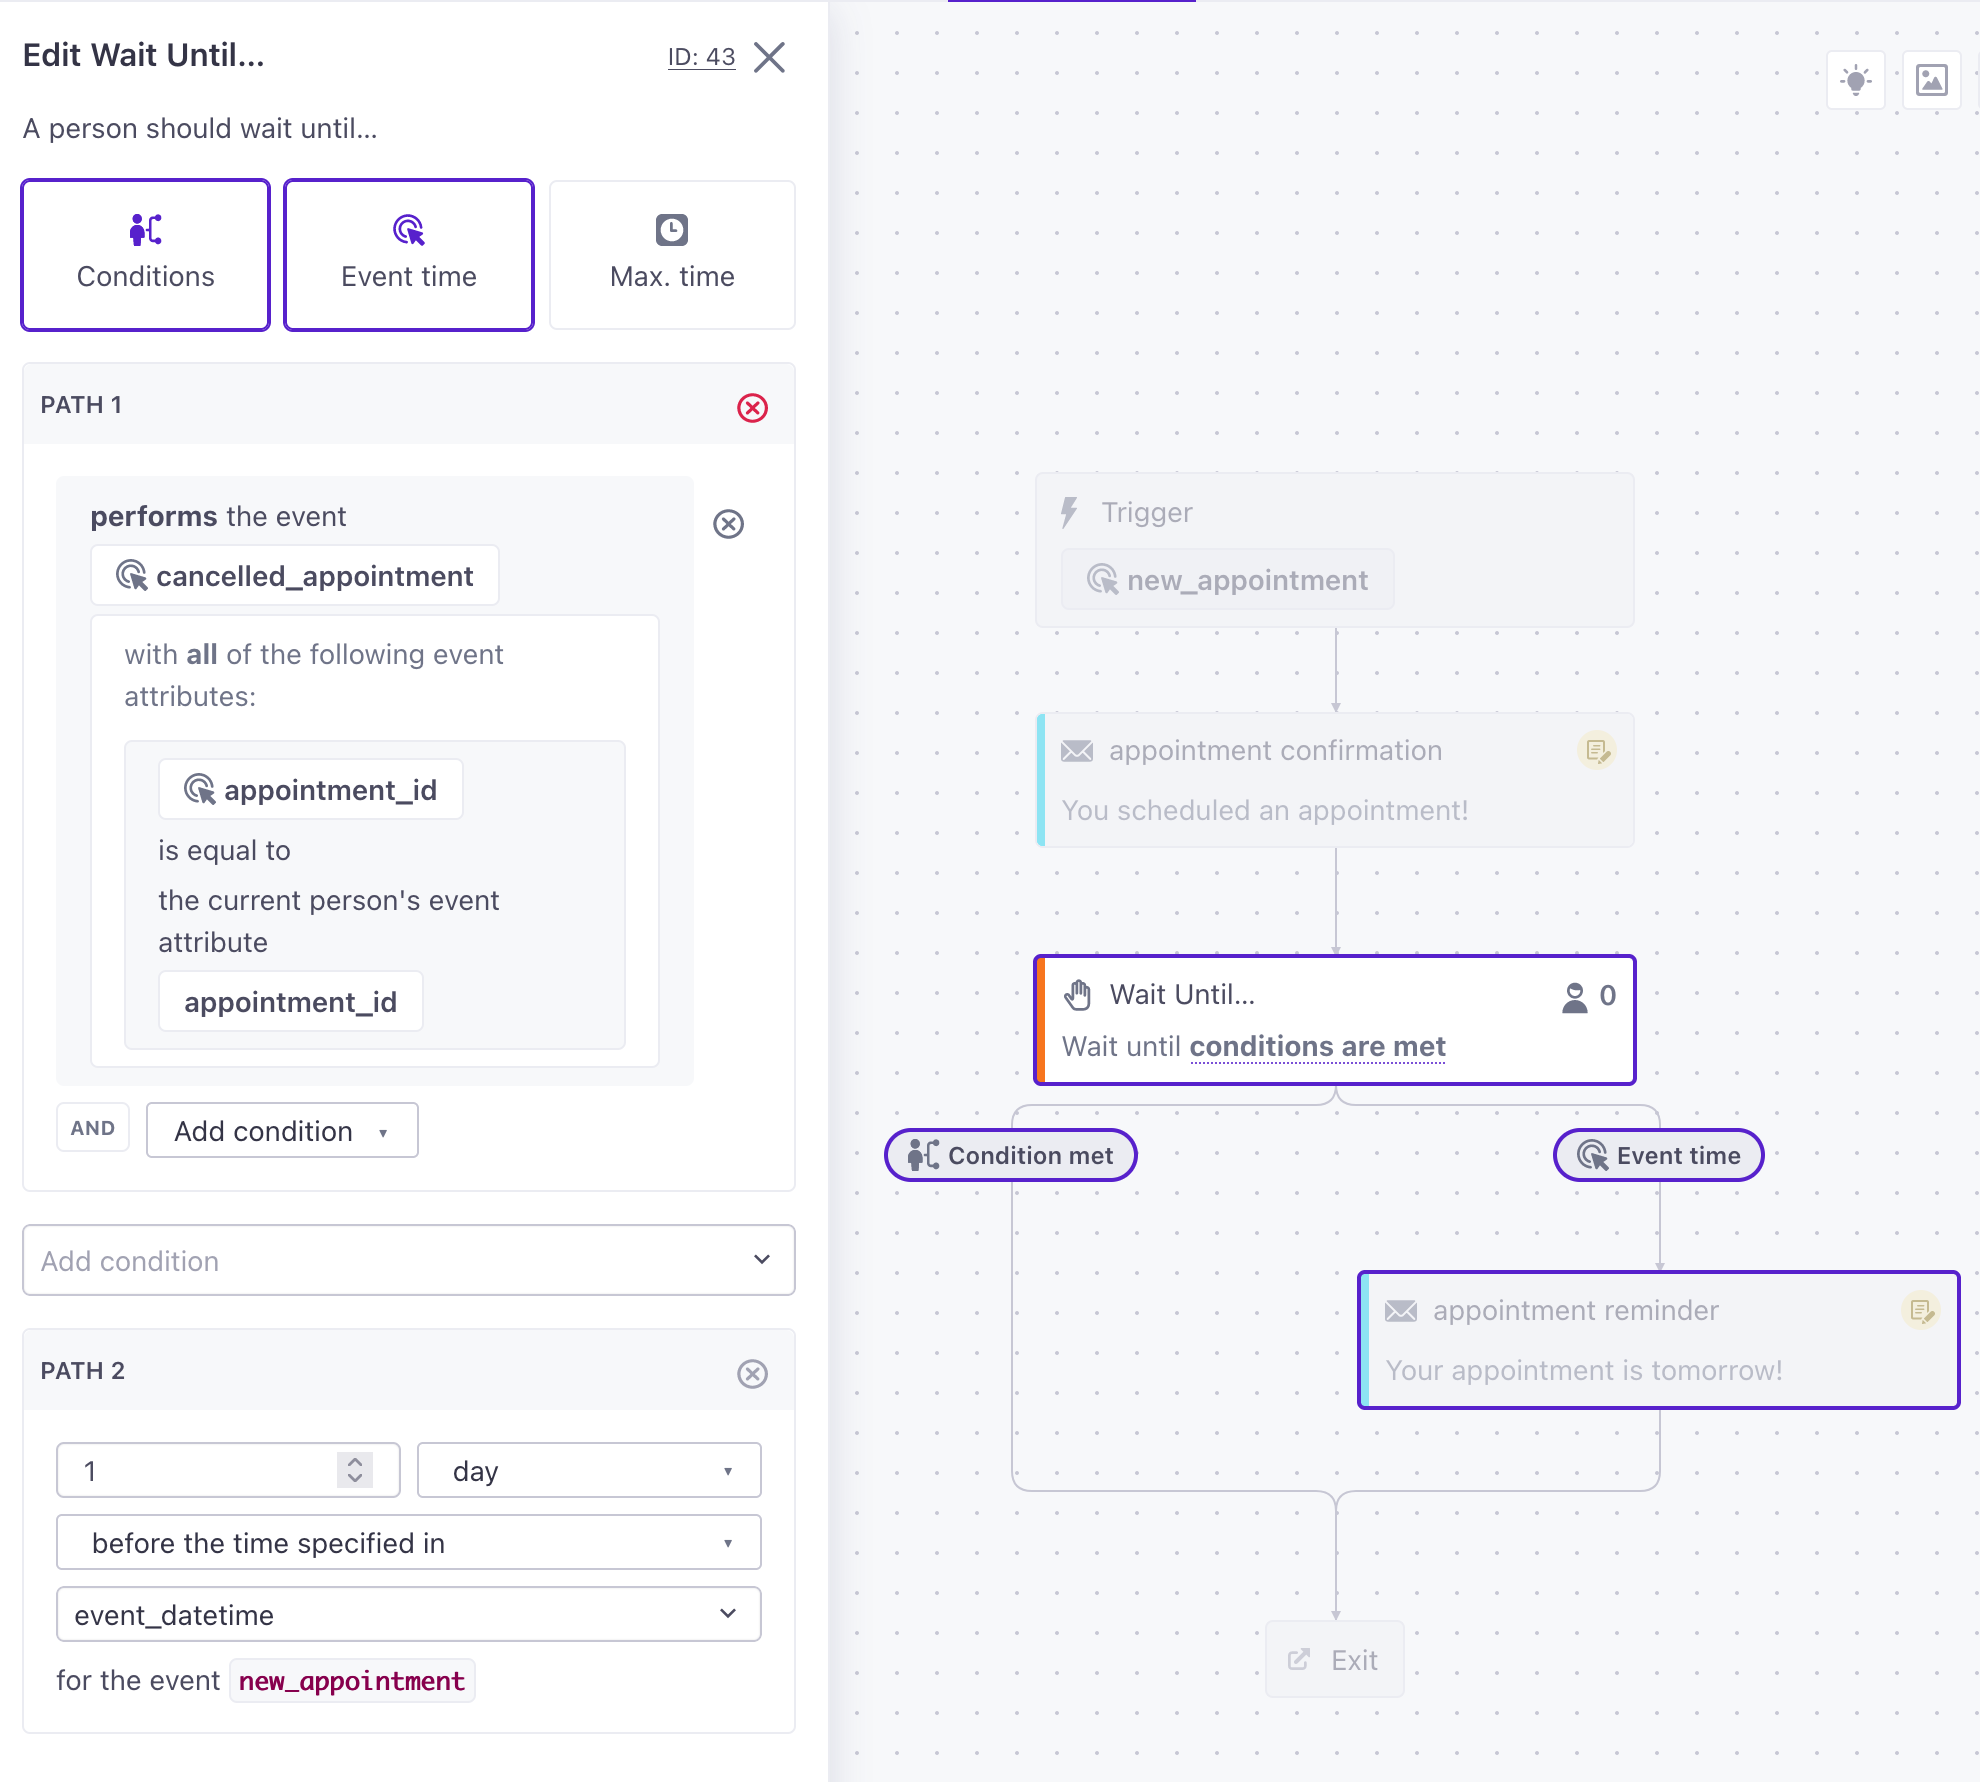
For example, imagine that a person enters a campaign when they set up an appointment—they generate a new_appointment event with an appointment_id. You want to wait until the day before the event to send an email reminding a person about their appointment—but you don’t want to send a reminder if they already cancelled the appointment.
In this case, you can set up a Wait Until… condition to look for an cancelled_appointment event where the appointment_id matches the trigger event’s event.appointment_id. If the two values match, you don’t send the appointment reminder.

Evaluating multiple conditions
When you set conditions, you’ll see AND; these conditions are a part of a single path; a person must meet all of the conditions to progress down a path.
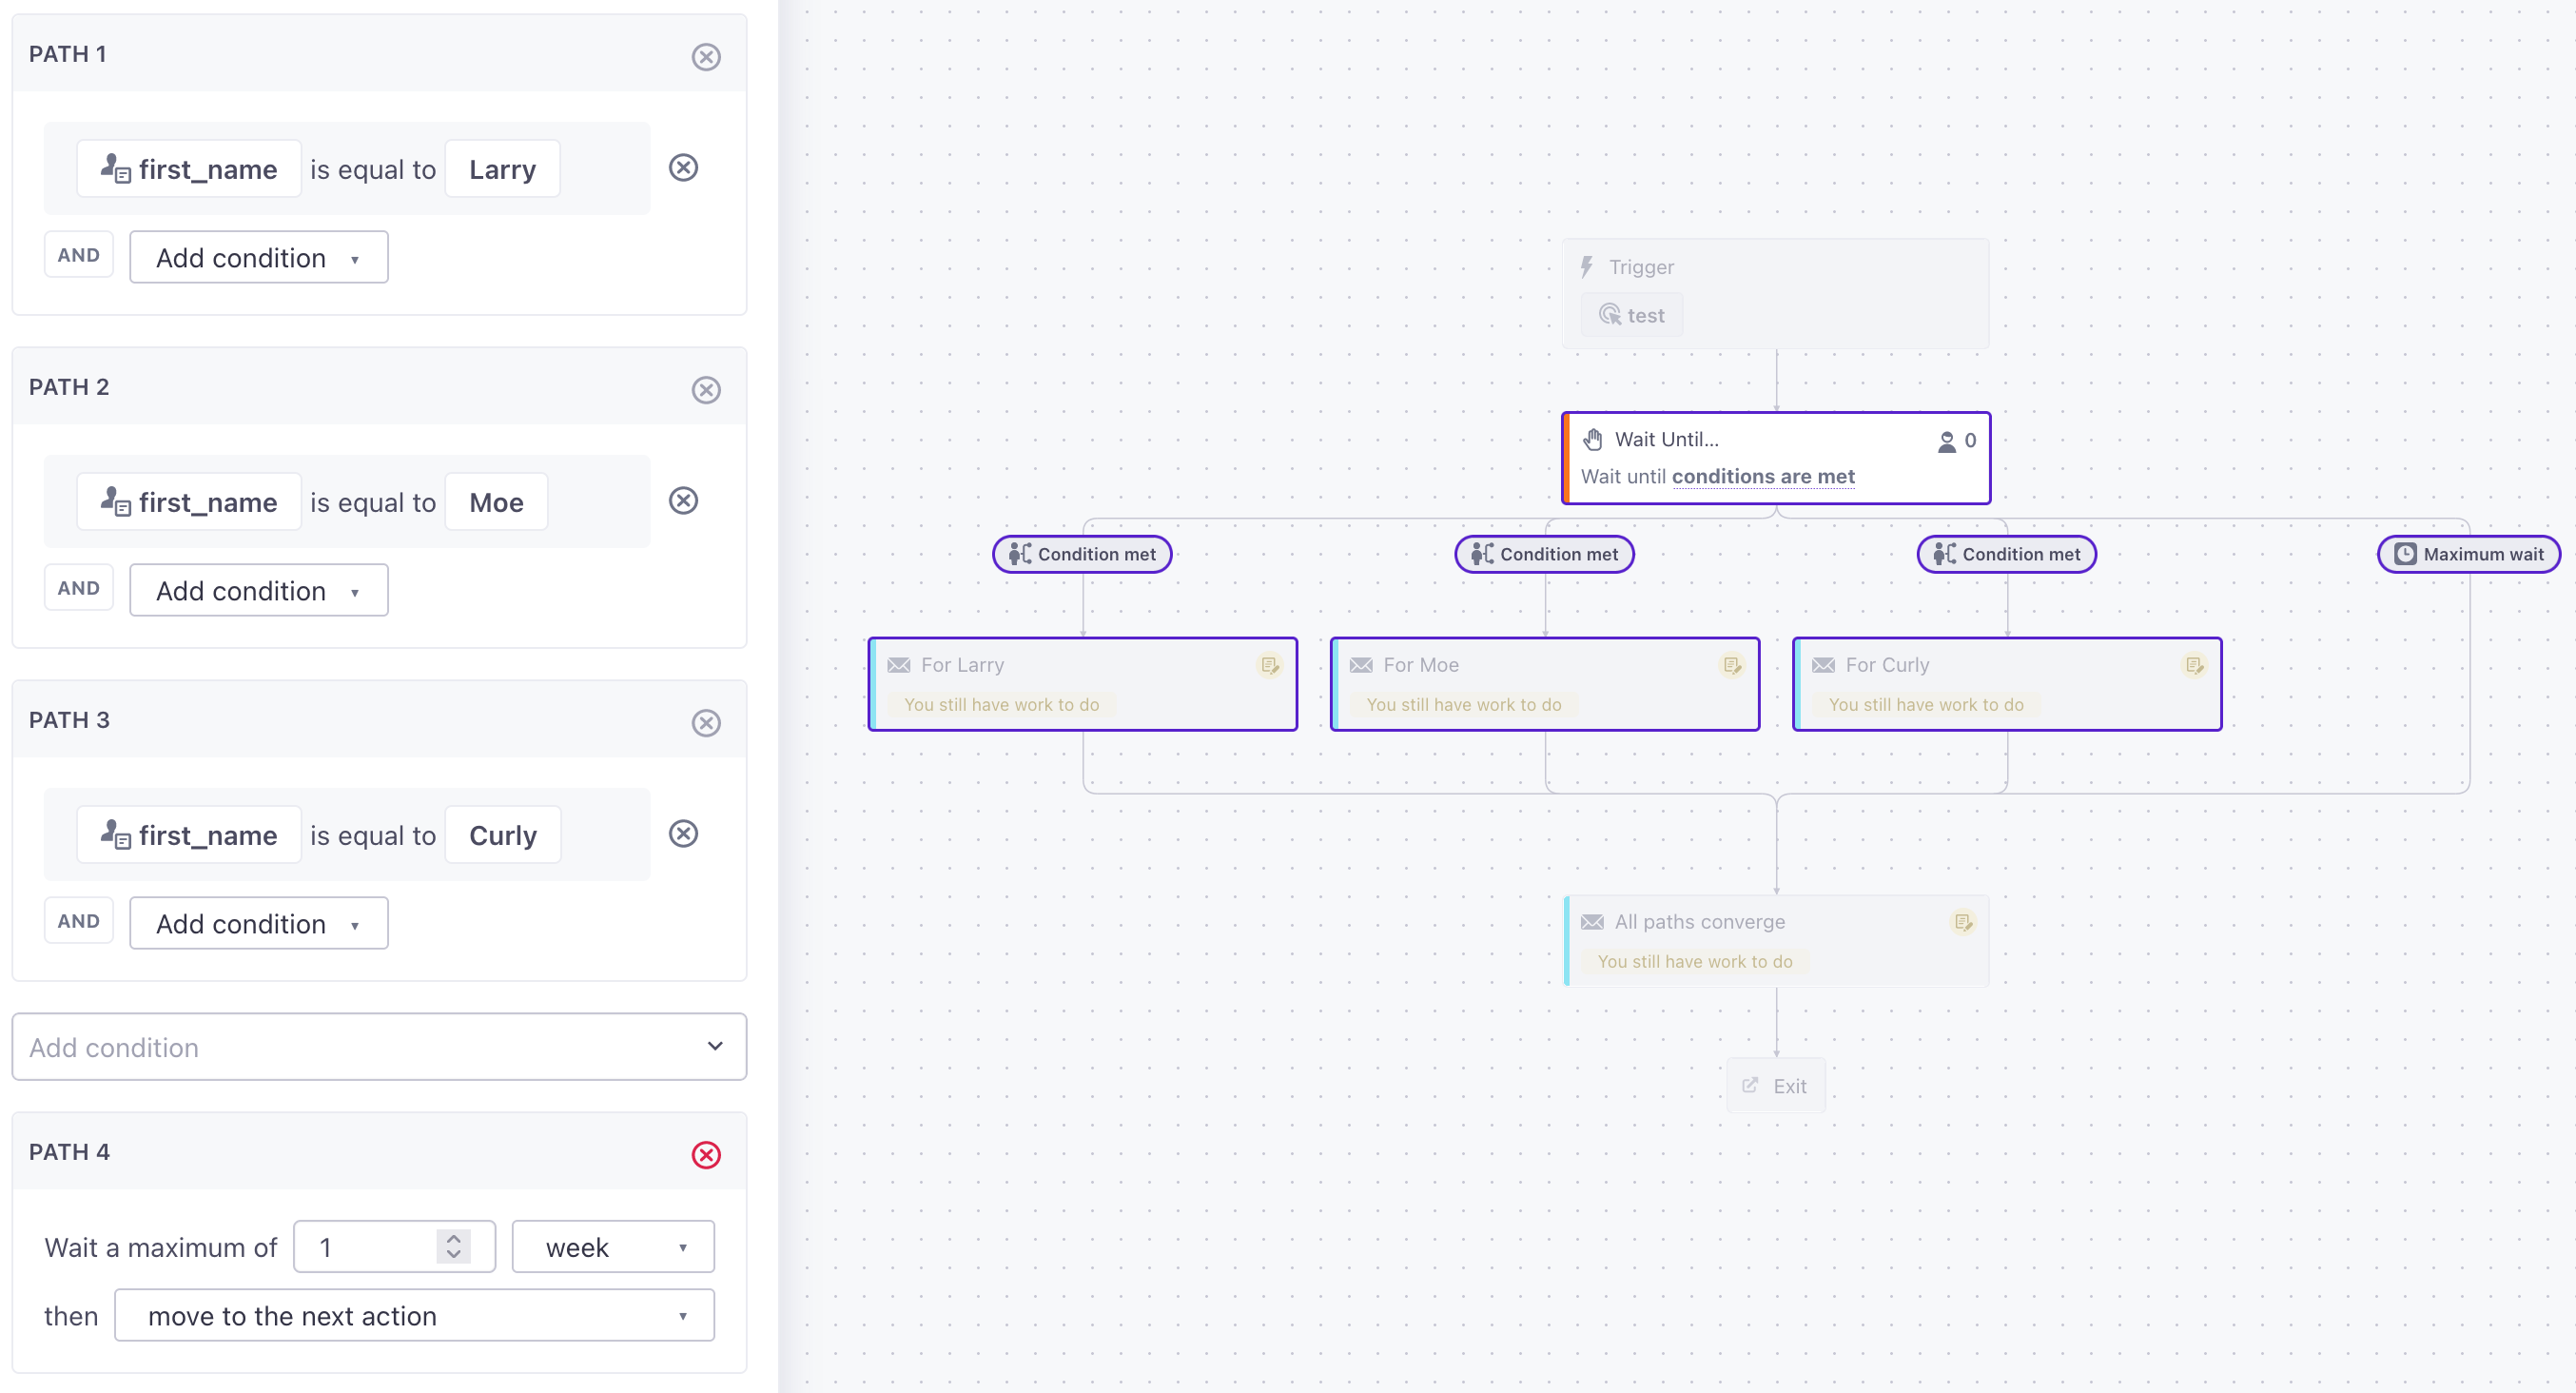
But, unlike Event time and Max. time, you can set up multiple Condition-based paths. Each set of conditions creates a branch in your workflow. If a person meets the conditions in any path, they’ll progress down the associated path.
Paths for your different wait conditions are numbered, starting at 1. In the workflow, they’ll read left-to-right. If a person meets the conditions in multiple paths simultaneously, they’ll go down the path closest to 1 (farthest to the left) in your workflow.

Message conditions
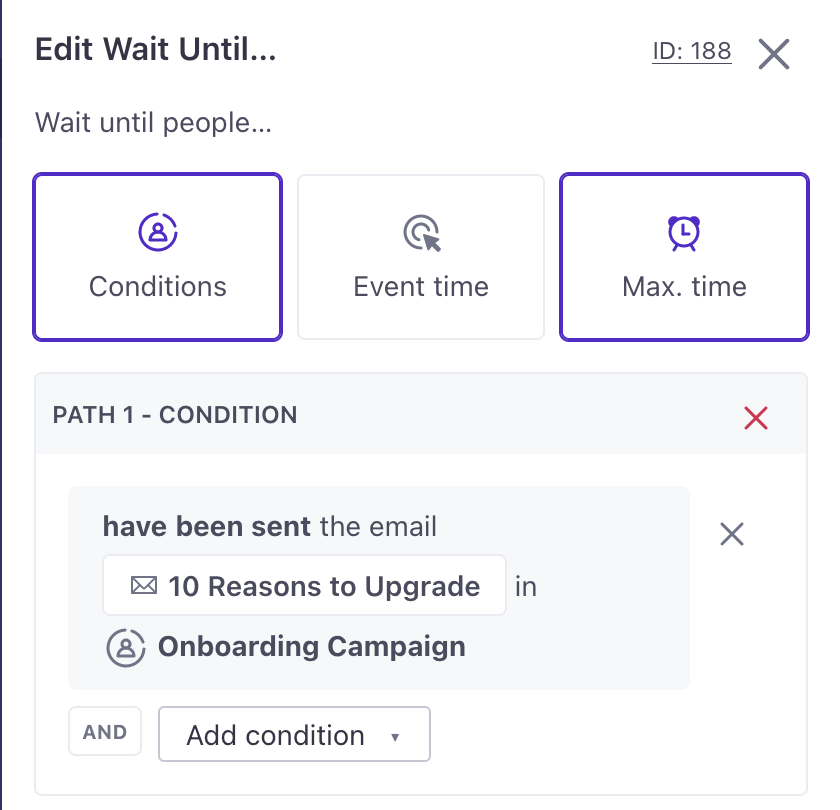
You can set conditions based on whether a person has or hasn’t been sent a message. This lets you send people down a path based on corresponding messages or campaigns outside your current workflow. In a message condition, you can check if a person has ever received a message, or wait until a message is sent after a person enters the wait.
The has ever and has not ever conditions are based on whether or not a person has ever received or not received a particular message. If you use the has ever condition, and the person received a message last year, they’ll meet the conditions of your wait.
The is condition is only satisfied if a person is sent a message after they enter the wait. This prevents people from inadvertently meeting wait conditions based on messages sent long before a person entered your campaign or wait.

Event time
If your campaign is triggered by an event, you can wait until a timestamp value in your event before moving on to the next step in your workflow. For example, if you trigger your campaign with an event called new_appointment you could Wait until the day before the appointment_time in your event to send a message reminding a person about their upcoming appointment.
The timestamp in your event can be either:
- Unix timestamp (in seconds)
- RFC 8601-formatted time (e.g.
2022-06-04T10:24:34-0400).
Unlike event conditions, you can’t base this time on another event. Your timestamp value must be a part of the event that triggers your campaign.
If the event timestamp doesn’t exist, the condition won’t work
If you send an event that either doesn’t contain the timestamp specified in your wait, or the timestamp is incorrectly formatted, your event timestamp condition won’t do anything. Your audience will wait until they meet another condition. If your wait doesn’t have any other conditions, a person could wait forever!
The Max time fallback
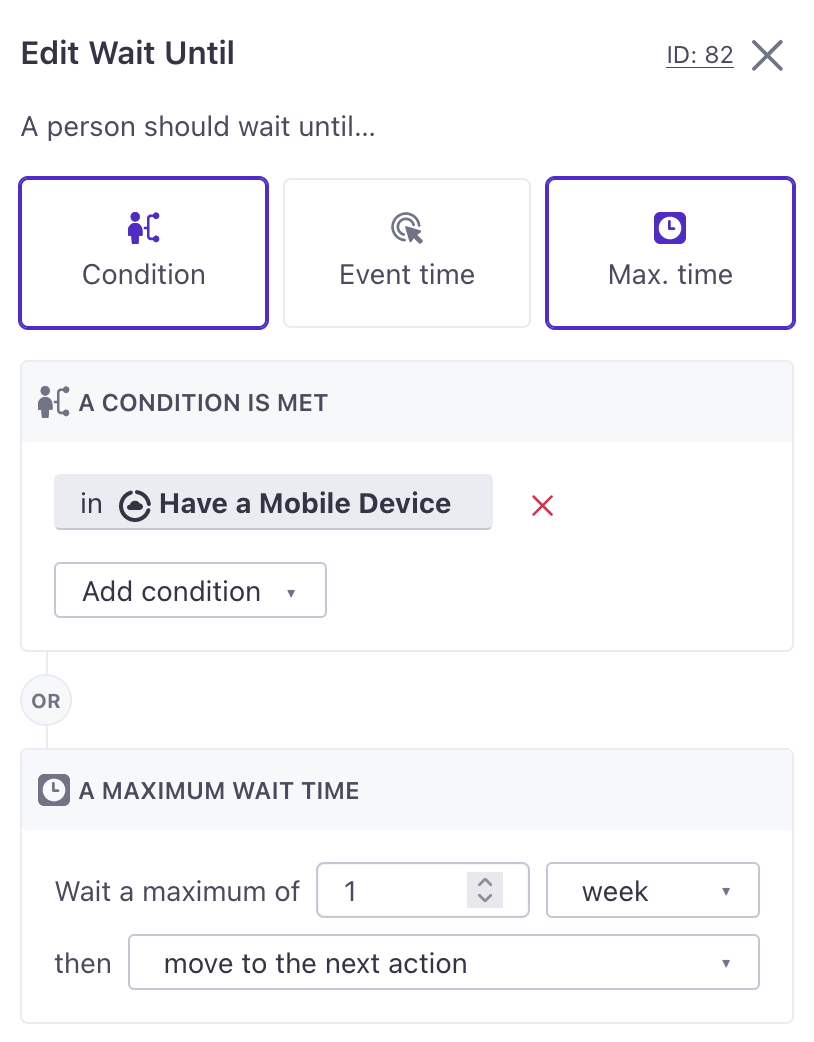
By default, people will wait until they meet your conditions. If they never meet your conditions, they could get stuck waiting in your campaign forever! Use the Max time option to let people exit the campaign or move on to the next action.
In this example, if a person isn’t in the specified segment after one week, they’ll move on to the next action in the workflow.

Segment “Not in…” conditions
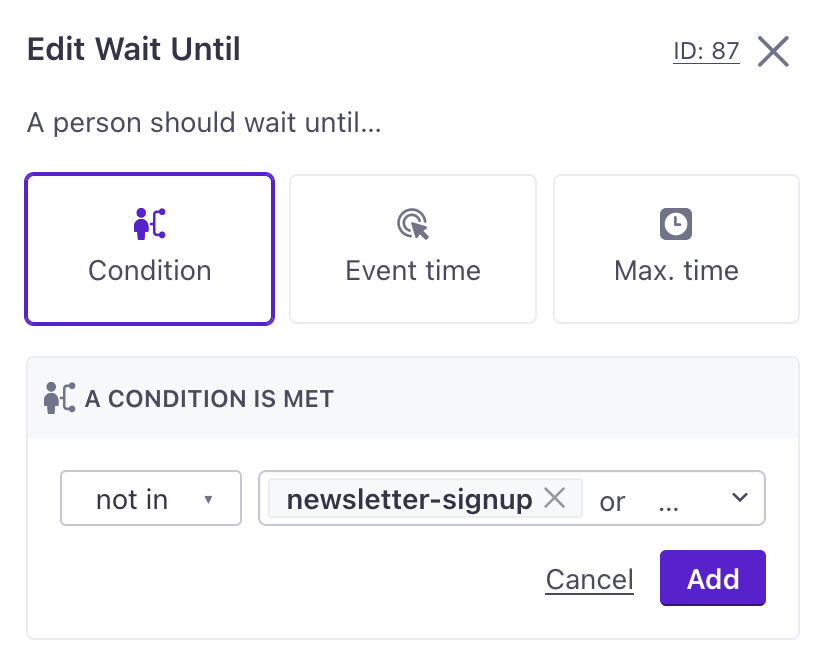
If you base your wait condition on whether people are not in a segment, people who were never in the segment will skip the wait. If people are already in the segment, they will be held in the wait until they leave the segment.

Why did someone skip the wait?
If a person meets your wait conditions before they enter the wait, they’ll skip it entirely. We evaluate the conditions as soon as someone reaches the Wait until block; someone doesn’t have to meet the conditions again to progress past it.
'Wait Until...' block)-->z z{does the person
already meet conditions?} z-->|no|a(person begins
waiting) z-.->|yes, person
skips wait|c c(person moves to
the next action)
For example, imagine that someone performs an event—they signed up for a class at a local school. You want to send them a reminder message a week before the class starts.
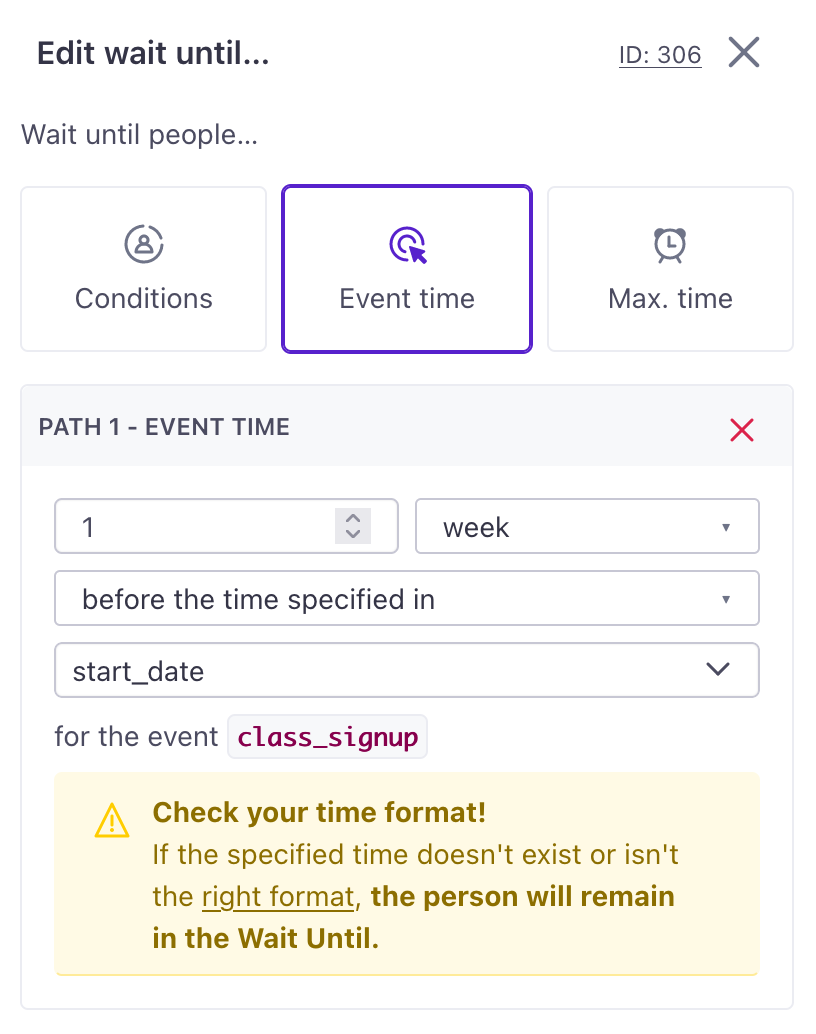

If someone signed up late for the class, and the class starts in less than a week, they’ll skip the wait and move on to the reminder message.


Editing a Wait Until
You can edit the conditions of your Wait Until; just be aware that doing so might cause people to quit waiting.
For example, if you change an Event time condition from seven days that is then reduced to two days:
- People who have already waited more than two days will move on (or exit the campaign)
- People who have not yet waited two days will continue waiting
Deleting a Wait Until
If you delete a Wait until, you can choose what to do with anybody currently waiting.
- Continue to the next action in the campaign
- Exit the campaign immediately
It’s up to you! If people have been waiting a long time, you may not want to continue sending messages in the campaign.
Copying a Wait Until
It’s easy to copy the Wait Until between campaigns within the same workspace, because your segment conditions remain the same.
If copying between workspaces, you’ll need to re-add your conditions, and we’ll show you a warning note both in the workflow and when editing the item.
Combining Wait Until and Time Delays
You might combine a delay and a wait, but pay attention to the order of your delay and wait blocks, so that you don’t make people wait unnecessarily in your workflow. For example, you might set up a delay and wait such that your workflow has the following blocks:
- Delay 7 days
- Wait until person enters a segment
In this case, people will wait seven days,and then as long as it takes to enter your segment. In this case, a person will always wait at least 7 days before progressing to the email in your campaign, but they could wait longer after that.
However, you might set the delay after the wait, making sure that people wait exactly 7 days after satisfying the wait condition.
- Wait until user enters segment
- Delay 7 days
Example wait and time window
Time windows and wait delays both use conditions to determine when a person progresses in your campaign. You might change the order of a time window and wait depending on whether you want to prioritize the time condition or your wait conditions.
Time Window first
- Wait for time window: Monday between 9AM and 5PM
- Wait until user enters segment
In this case, people wait until Monday at 9AM, and then move into the Wait until block. They’ll then wait as long as it takes for them to meet the segment condition before they receive an email. If people are not in the segment between 9 and 5 on Monday (even if they’ve entered and left it before), they won’t receive the email.
Wait Until first
- Wait until user enters segment
- Wait for time window: Monday between 9AM and 5PM
In this case, people will wait until they enter the segment, and then begin waiting for Monday at 9AM (assuming it isn’t already that time). If the user stops matching the ‘Paying Customers’ segment condition while they’re waiting for the time window, they will still get the email on Monday at 9AM.

