Multi-language support for the subscription center
You can translate, aka localize, your subscription center in Workspace Settings.
To translate custom copy on your subscription preferences page, like topics and a custom header and headline, you first need to add a topic and, optionally, customize your heading.
You can localize your subscription preferences page before and after enabling your subscription center.
We currently support 29 languages. Please let us know if you need support for another one!
Factors that influence how translations render for your audience
The following factors influence which languages your users will see on their subscription preferences page in this order:
The language parameter you add to the unsubscribe URL in emails. For example:
{% unsubscribe_url lang='fr' %}.- This also applies to the manage preferences URL like
{% manage_subscription_preferences_url lang='es' %}.
- This also applies to the manage preferences URL like
If you don’t provide a language parameter, then the language preferences in your recipients’ browser settings take precedence.
If you don’t provide translations for any of your recipients’ preferred languages, then they’ll see the language you created your topics and custom header copy in. In our UI, we call this the default language. The standard copy (like buttons) would render according to the recipients’ browser settings if the language is supported by Customer.io.
Note on supported languages and browser settings
There can be a disconnect between the language your users see for topics and the language they see for static copy. When there is no custom translation for your content (topics and custom headers), then the standard, static copy (like buttons and default header) will continute to display according to your recipients’ browser settings if the language is supported. This means your users could see two languages on your subscription preferences page.
For example:
- If their preferred language is French, one of the 29 languages we support, then their browser will surface the French translation provided by Customer.io for standard copy. But the topics and custom header would show in your default language, which may not be French.
- If their preferred language is Arabic, a language we do not support currently, then the translation they see for standard copy will be English. Your custom copy - topics and headers - would show in your default language. Some browsers will automatically translate the page into their preferred language, though.
Your users can always change the language of static copy using the language selector in the top-right corner of the page. If you have translations for your custom copy that match the dropdown selection, those will also appear.
Add or edit topic translations
Customer.io translates standard, static copy on global unsubscribe pages, topic unsubscribe pages, and subscription preferences pages. This includes headers and button copy. We do not automatically translate any of your custom copy, including topics or custom headings. To ensure your subscription preferences page is translated correctly for all of your users, you can add translations through your subscription center settings.
To begin localizing your subscription preferences page, you must create at least one topic.
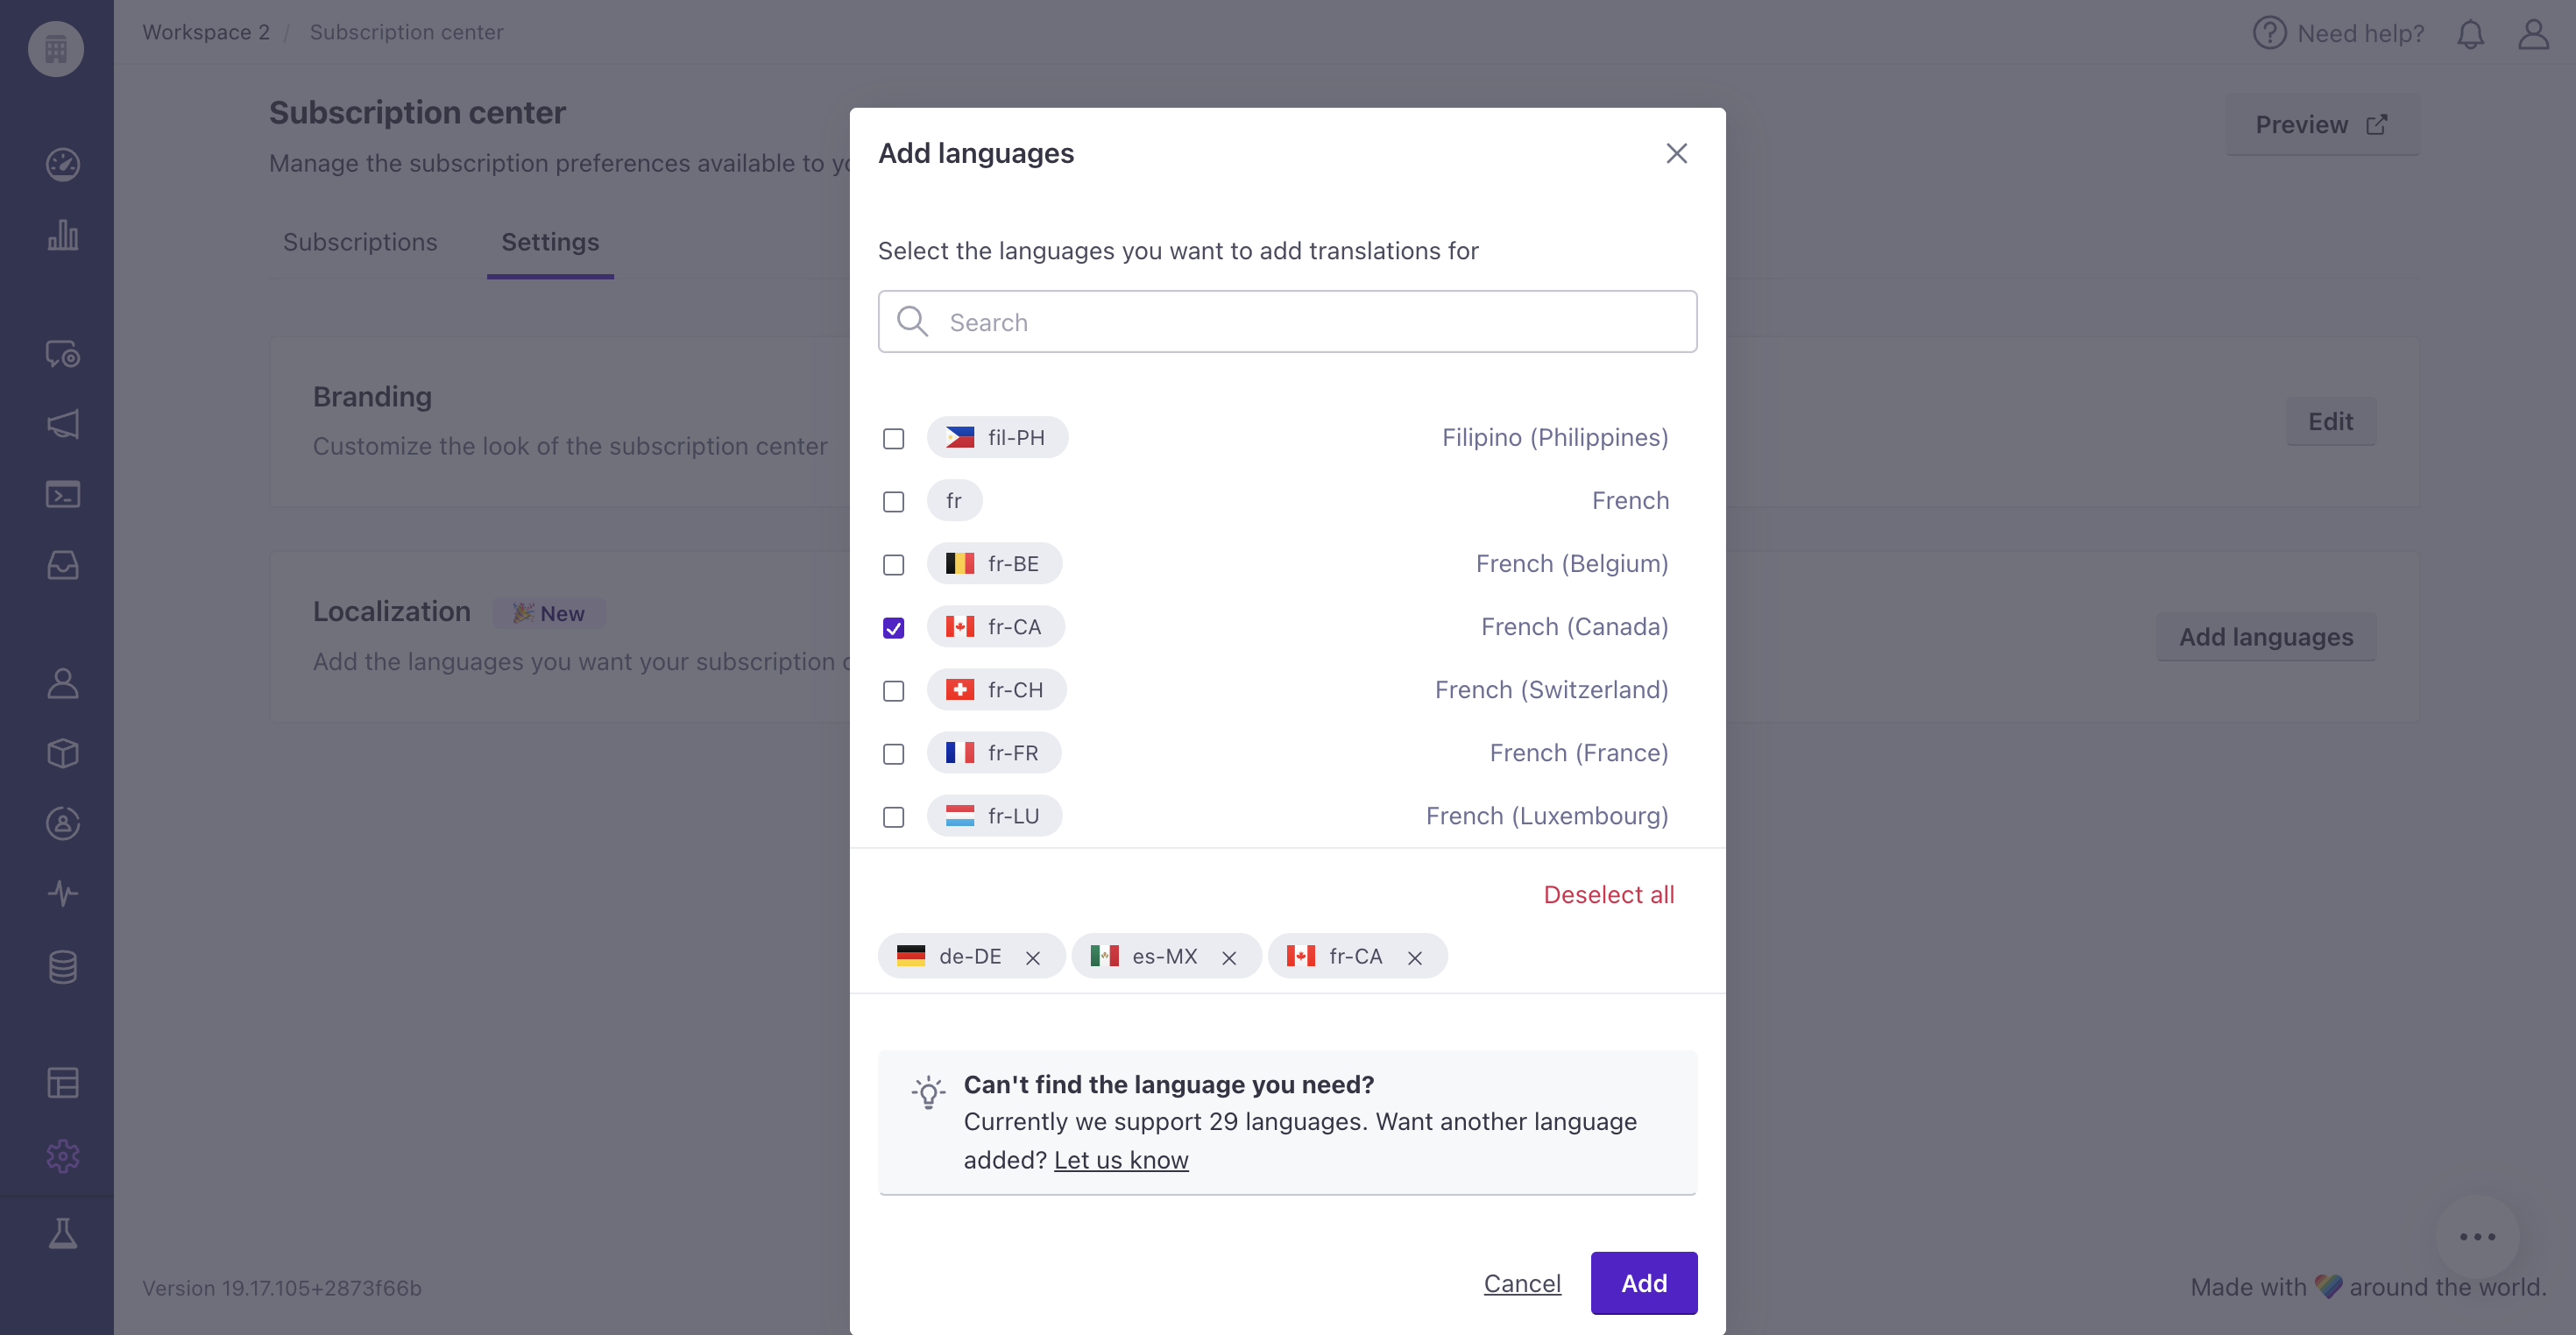
- Go to Settings > Workspace Settings > Subscription center > Settings. Click Add languages beside Localization.


- Check the box beside each language you want to supply a translation for. Then click Add.


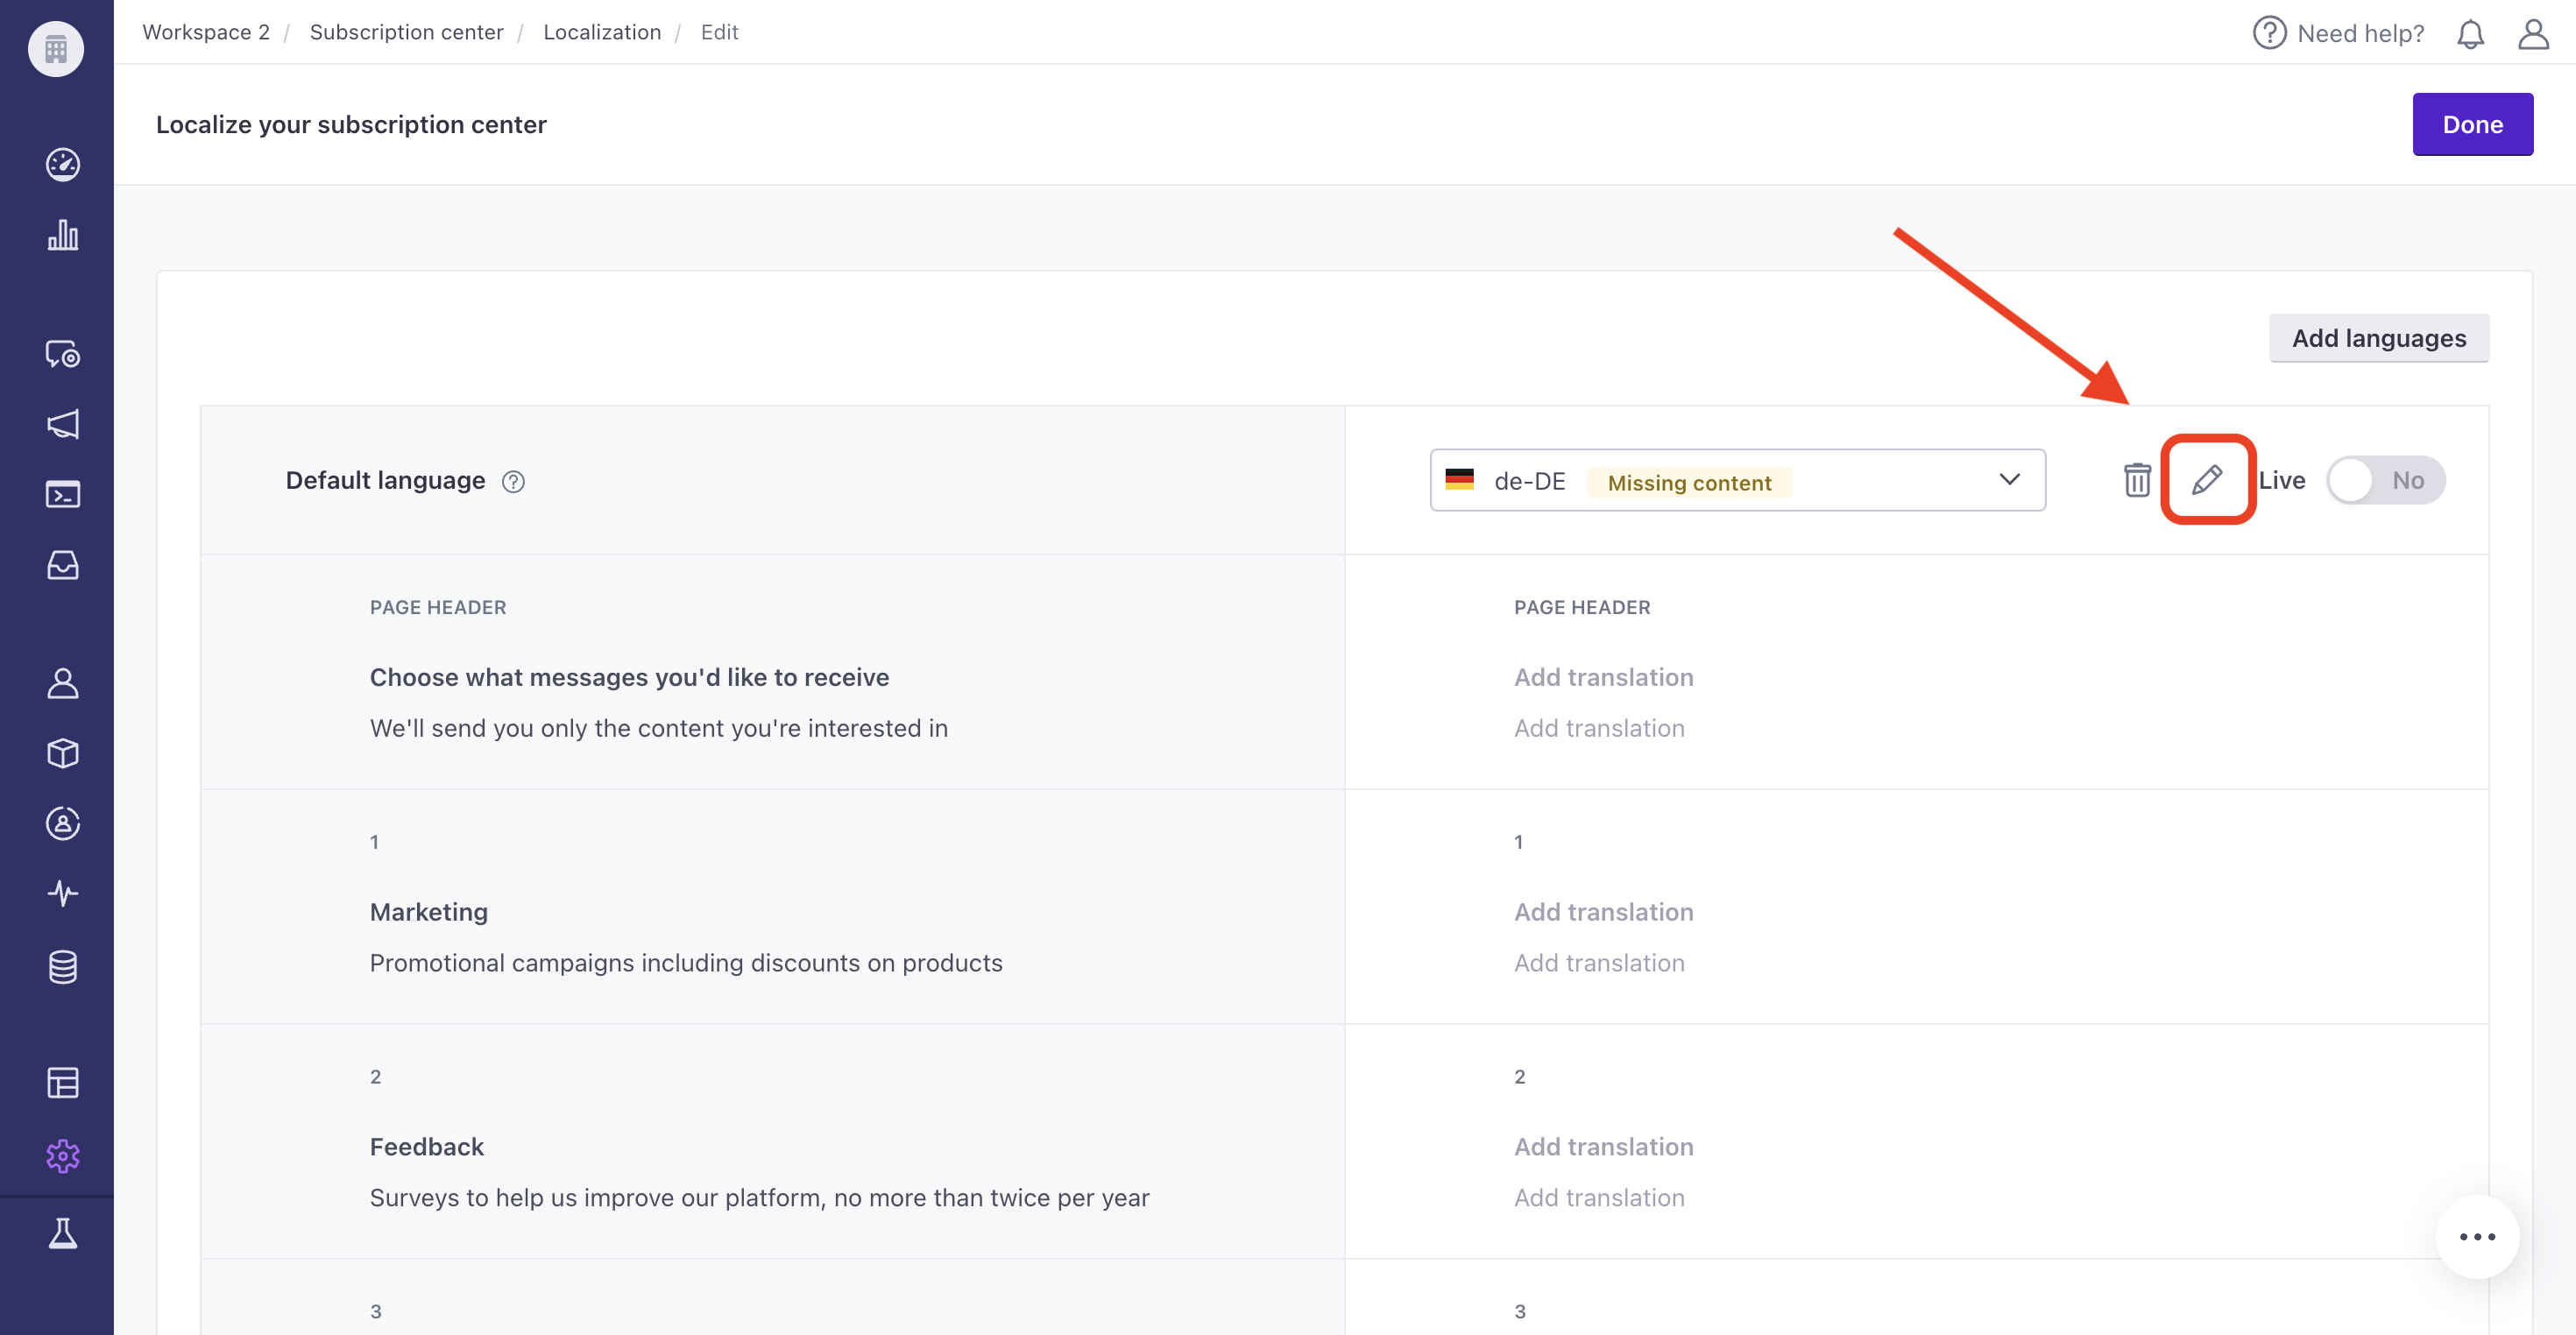
- You’ll see a dropdown with a language selected. On the left is your header, headline, and each topic on your preferences page. On the right, click the pencil icon to edit the translation for each item.


- Click Save.
If you edit the default language of a topic or add a new topic after making a translation live, your subscription preferences page will still render. In your workspace, you will see a warning symbol beside the topic name on the topics table, and the localization table will show “missing content” beside the language, reminding you to update your translations.
To edit a translation, click Edit instead of Add languages at the top of the localization table in Settings.
Next, make your translation live.
Edit the status of translations
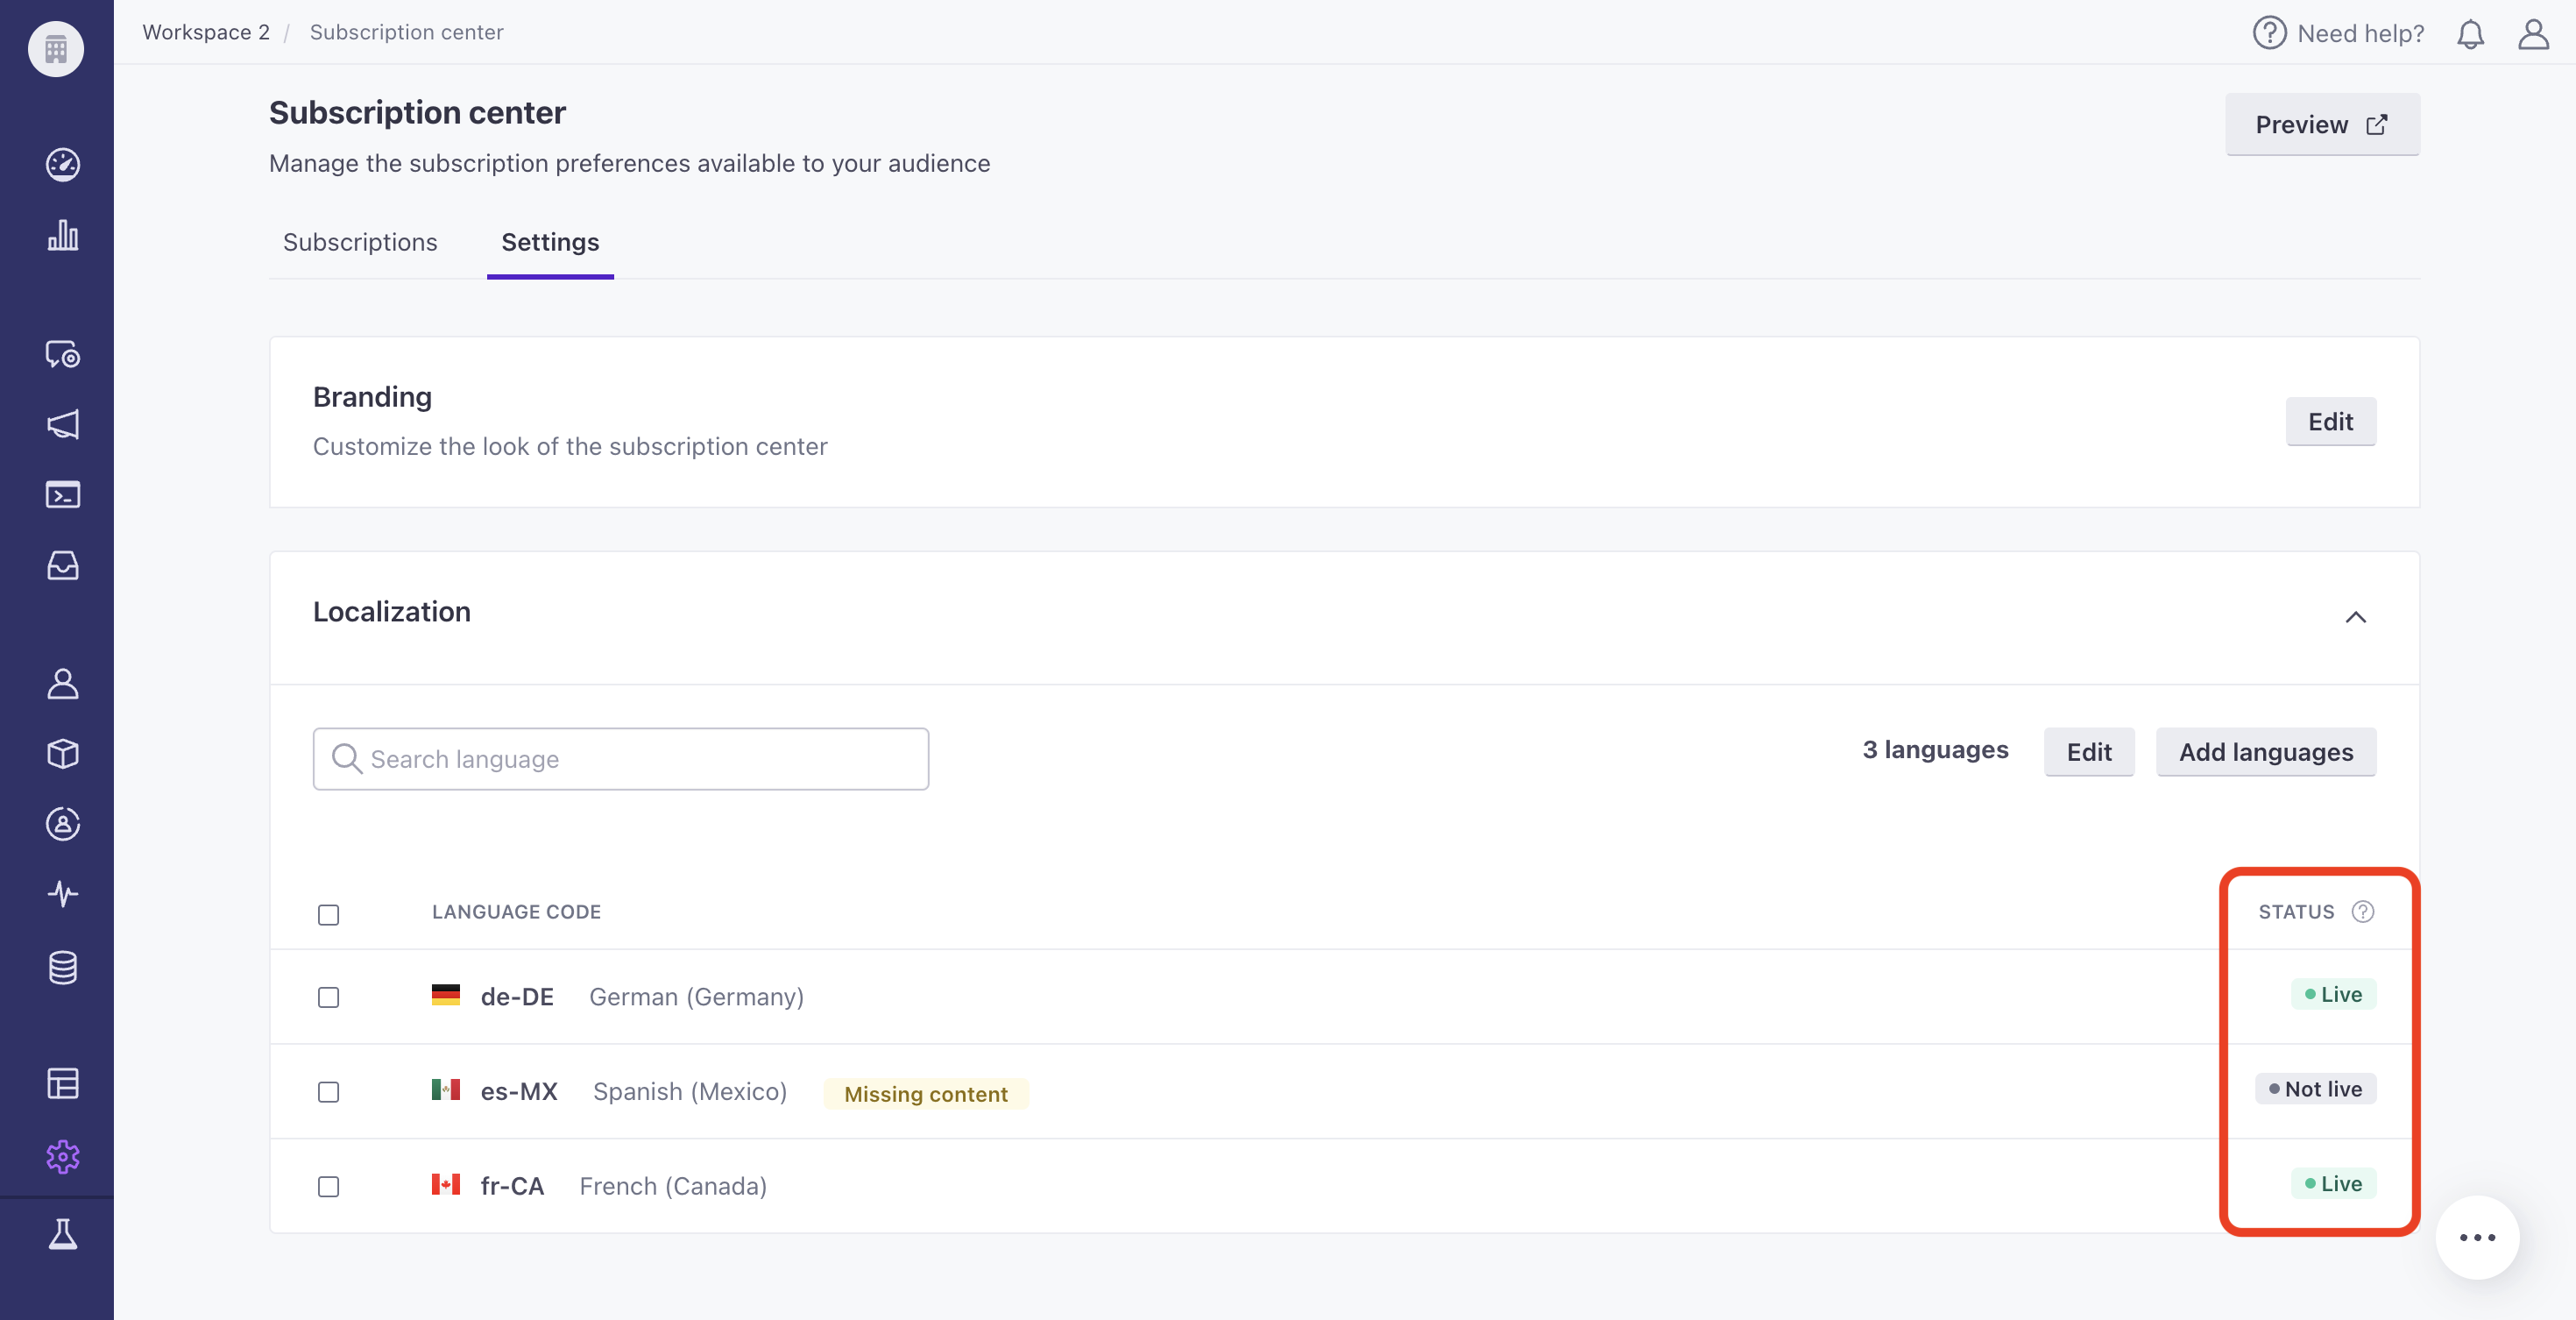
Just because your subscription center is enabled does not mean your translations are live to users. You must separately publish each translation.
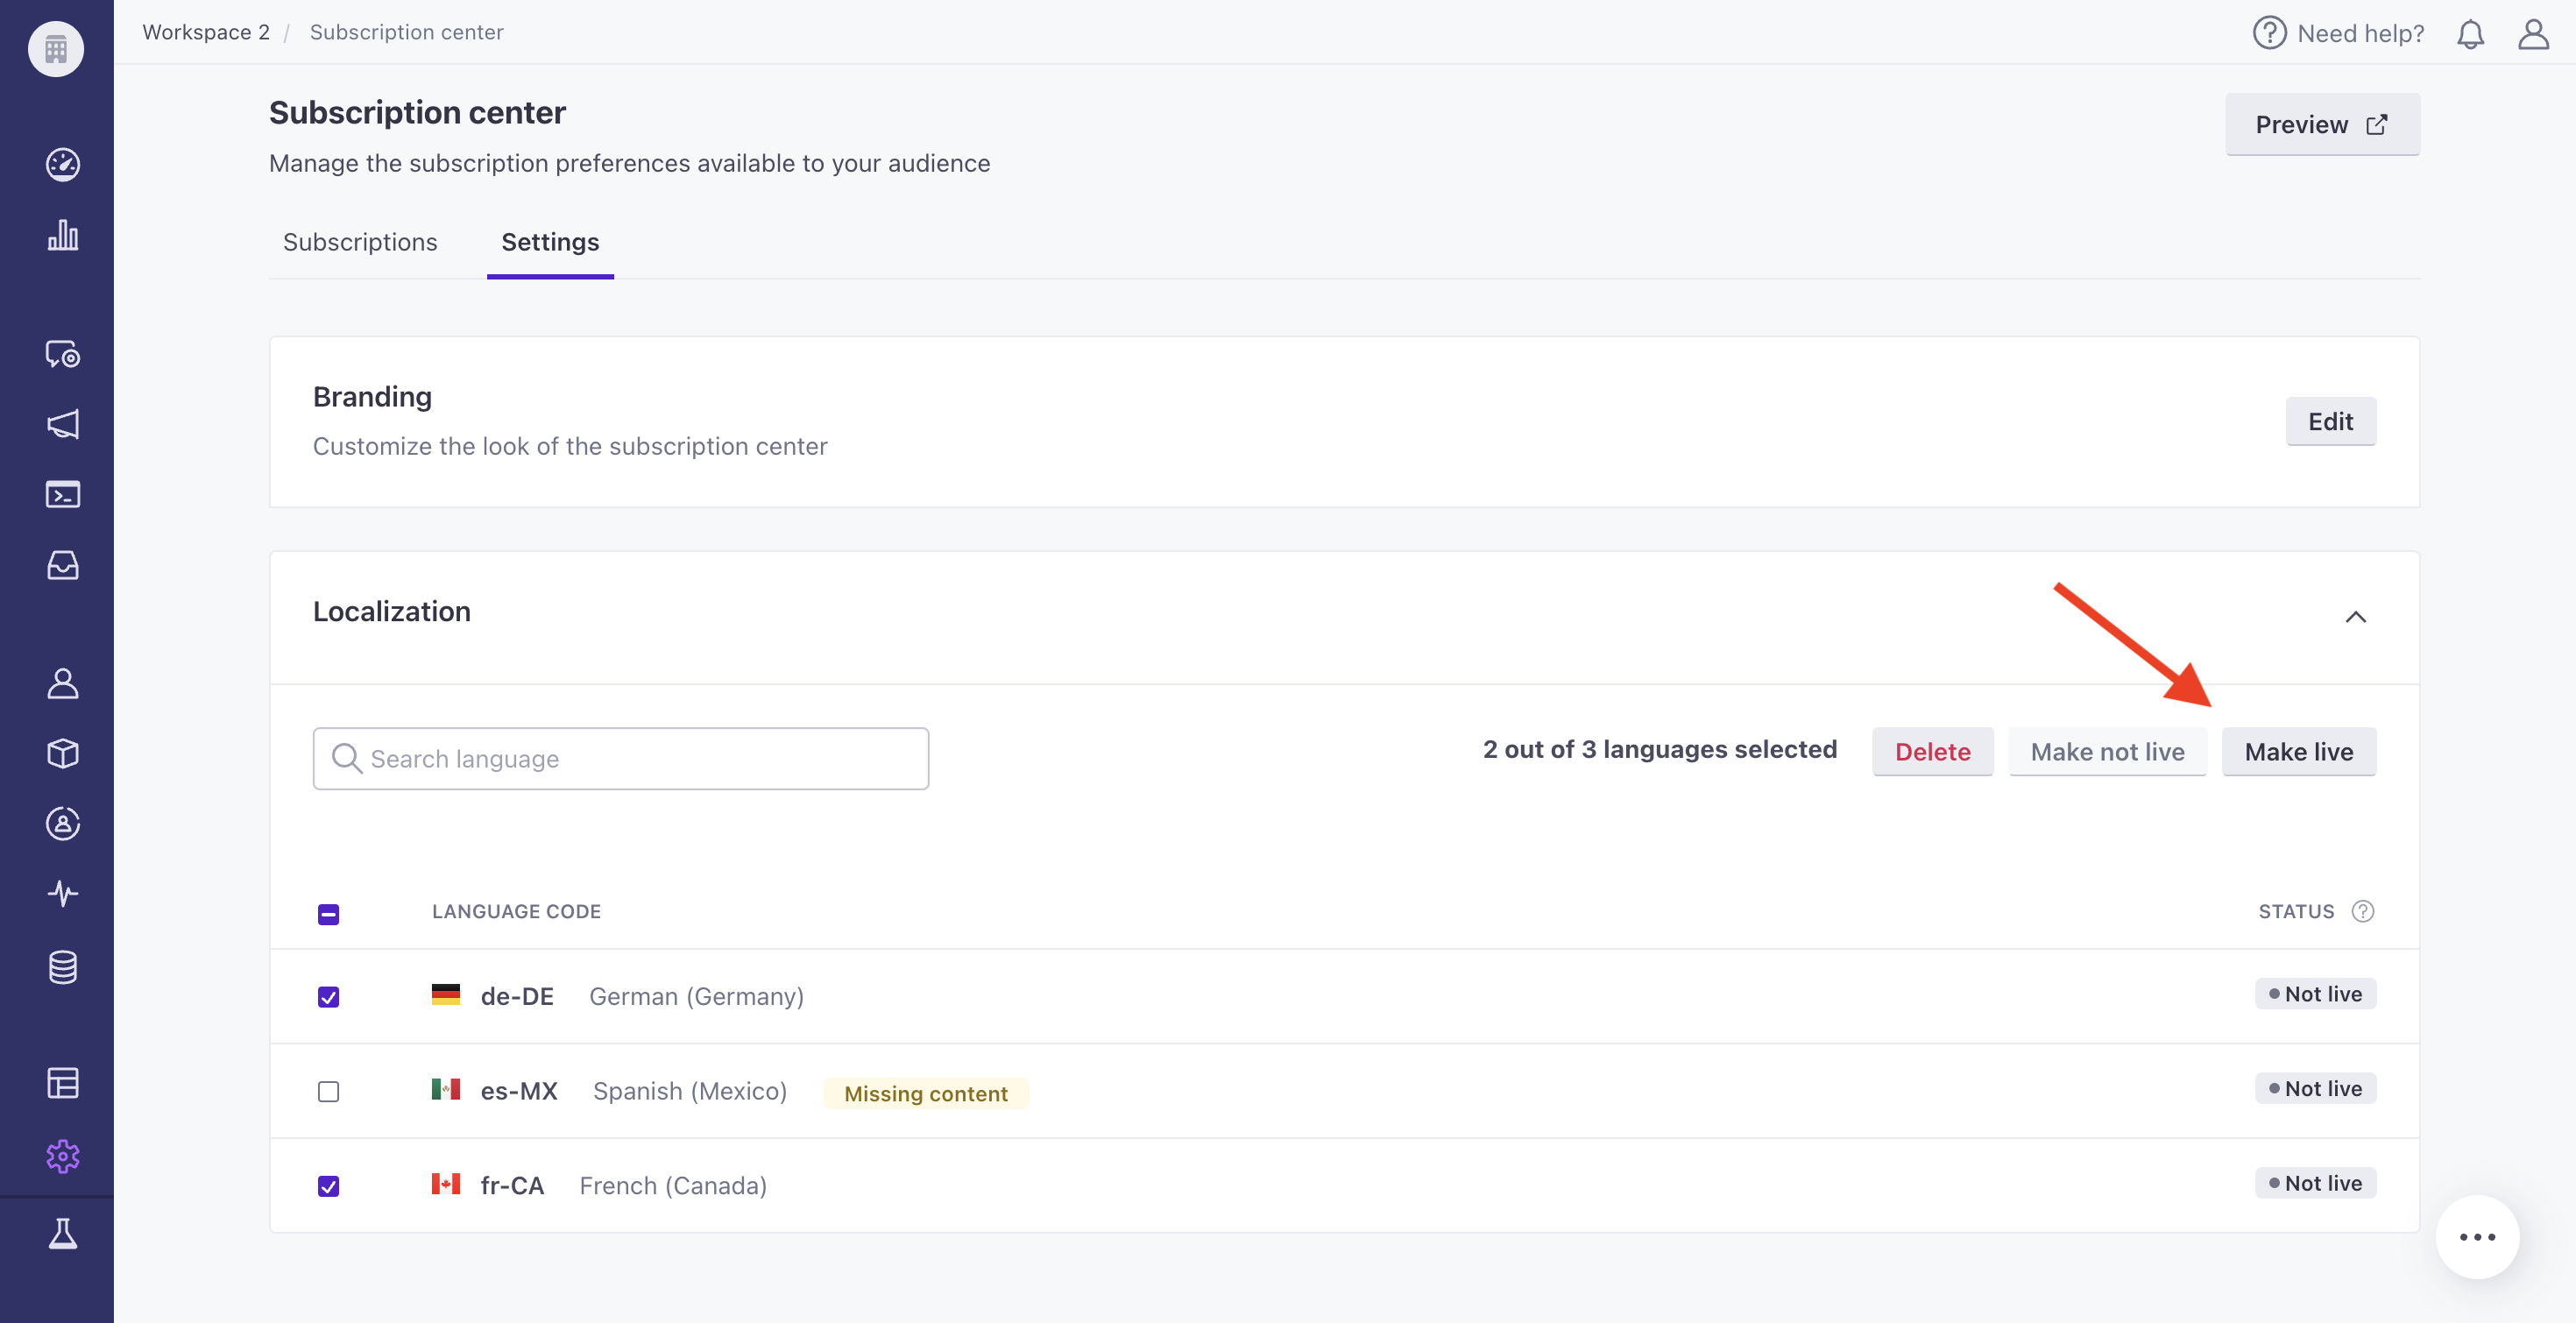
You can make a translation live in edit mode or from the table listing:
- Go to Settings > Workspace Settings > Subscription center > Settings.
- Check the box beside each language you want to make live under Localization. Select Make live at the top of the table.
The status for each translation will change to Live.

To unpublish a translation from your subscription preferences page, follow the same steps above but select Make not live instead. You will see a banner message confirming your action.
Preview your subscription preferences page at the top of Settings to review your changes.
Delete topic translations
You can delete a translation in edit mode or from the table listing.
To delete a translation from your subscription preferences page and workspace:
- Go to Settings > Workspace Settings > Subscription center > Settings.
- Check the box beside each language you want to delete under Localization.
- Select Delete at the top of the table. You’ll see a success banner indicating how many languages you just deleted.


