Hubspot integration
This article covers sending data from Hubspot to Customer.io. Looking to send data to Hubspot? Use our Hubspot destination!
If you need a way to sync Hubspot with Customer.io, this article is for you! While we don’t have an out-of-the-box integration for sending data from Hubspot to Customer.io, you can:
- create a webhook campaign to retrieve this data or
- use Zapier to connect Hubspot to Customer.io or
- check out our partners to see if one of their integrations could suit your needs
Some other options include exporting your Hubspot contacts and importing them to Customer.io. You can also create a custom integration and programmatically add/update people via our Track API.
Webhook campaigns
Prerequisites
Webhook campaigns are included in every Customer.io plan. However, not all Hubspot plans support webhooks or Hubspot workflows, both of which you’ll need to successfully create this campaign. Check out Use webhooks with Hubspot workflows to see if your plan supports them.
To create a webhook campaign in Customer.io, you need to be an Admin, Workspace Manager, or Author with Full Access.
Send data from Hubspot with webhook campaigns
In this recipe, we’ll show you how to create and update contacts from Hubspot in Customer.io. Make sure you’ve read the prerequisites before proceeding.
Check your Hubspot plan. Does it include webhooks and workflows? If yes, proceed ahead! If not, use one of the other options above.
Go to your Customer.io Account Settings to check how you identify people.
 These are your options when mapping contacts in Hubspot to people in Customer.io.
If you don’t have account-level access, go to your Workspace Settings to check.
Create a webhook campaign.
- In step 3, add the webhook URL to a Hubspot workflow.
- In step 5, drag a Create or Update Person action into your campaign workflow in Customer.io.
- Make sure you map your people identifier in Hubspot to a Customer.io identifier supported by your workspace (see step 2 above).
Review your campaign and click Start Campaign.
Keep in mind, we count people towards billing. Review our best practices for keeping a clean workspace with only the people profiles you need month-to-month.
Zapier
Prerequisites
You can install the Zapier app, free-of-charge, on any Hubspot plan. However, you may need a paid Zapier plan depending on the volume of data you need to send to Customer.io. Review Zapier’s concept of tasks to help you understand how usage is calculated in Zapier.
To integrate Zapier with Customer.io, you’ll need to be an Admin or Workspace Manager in Customer.io.
Send data from Hubspot with Zapier
This recipe shows how to create and update contacts from Hubspot in Customer.io. Make sure you’ve read the prerequisites before proceeding.
- Install Zapier in Hubspot, then sign in or create a Zapier account.
- Create a zap.
- Add a descriptive name at the top so you can distinguish it from other zaps.
- Set your trigger as “Hubspot.”
- Choose the event “Contact recently created or updated” or another event that meets your needs.
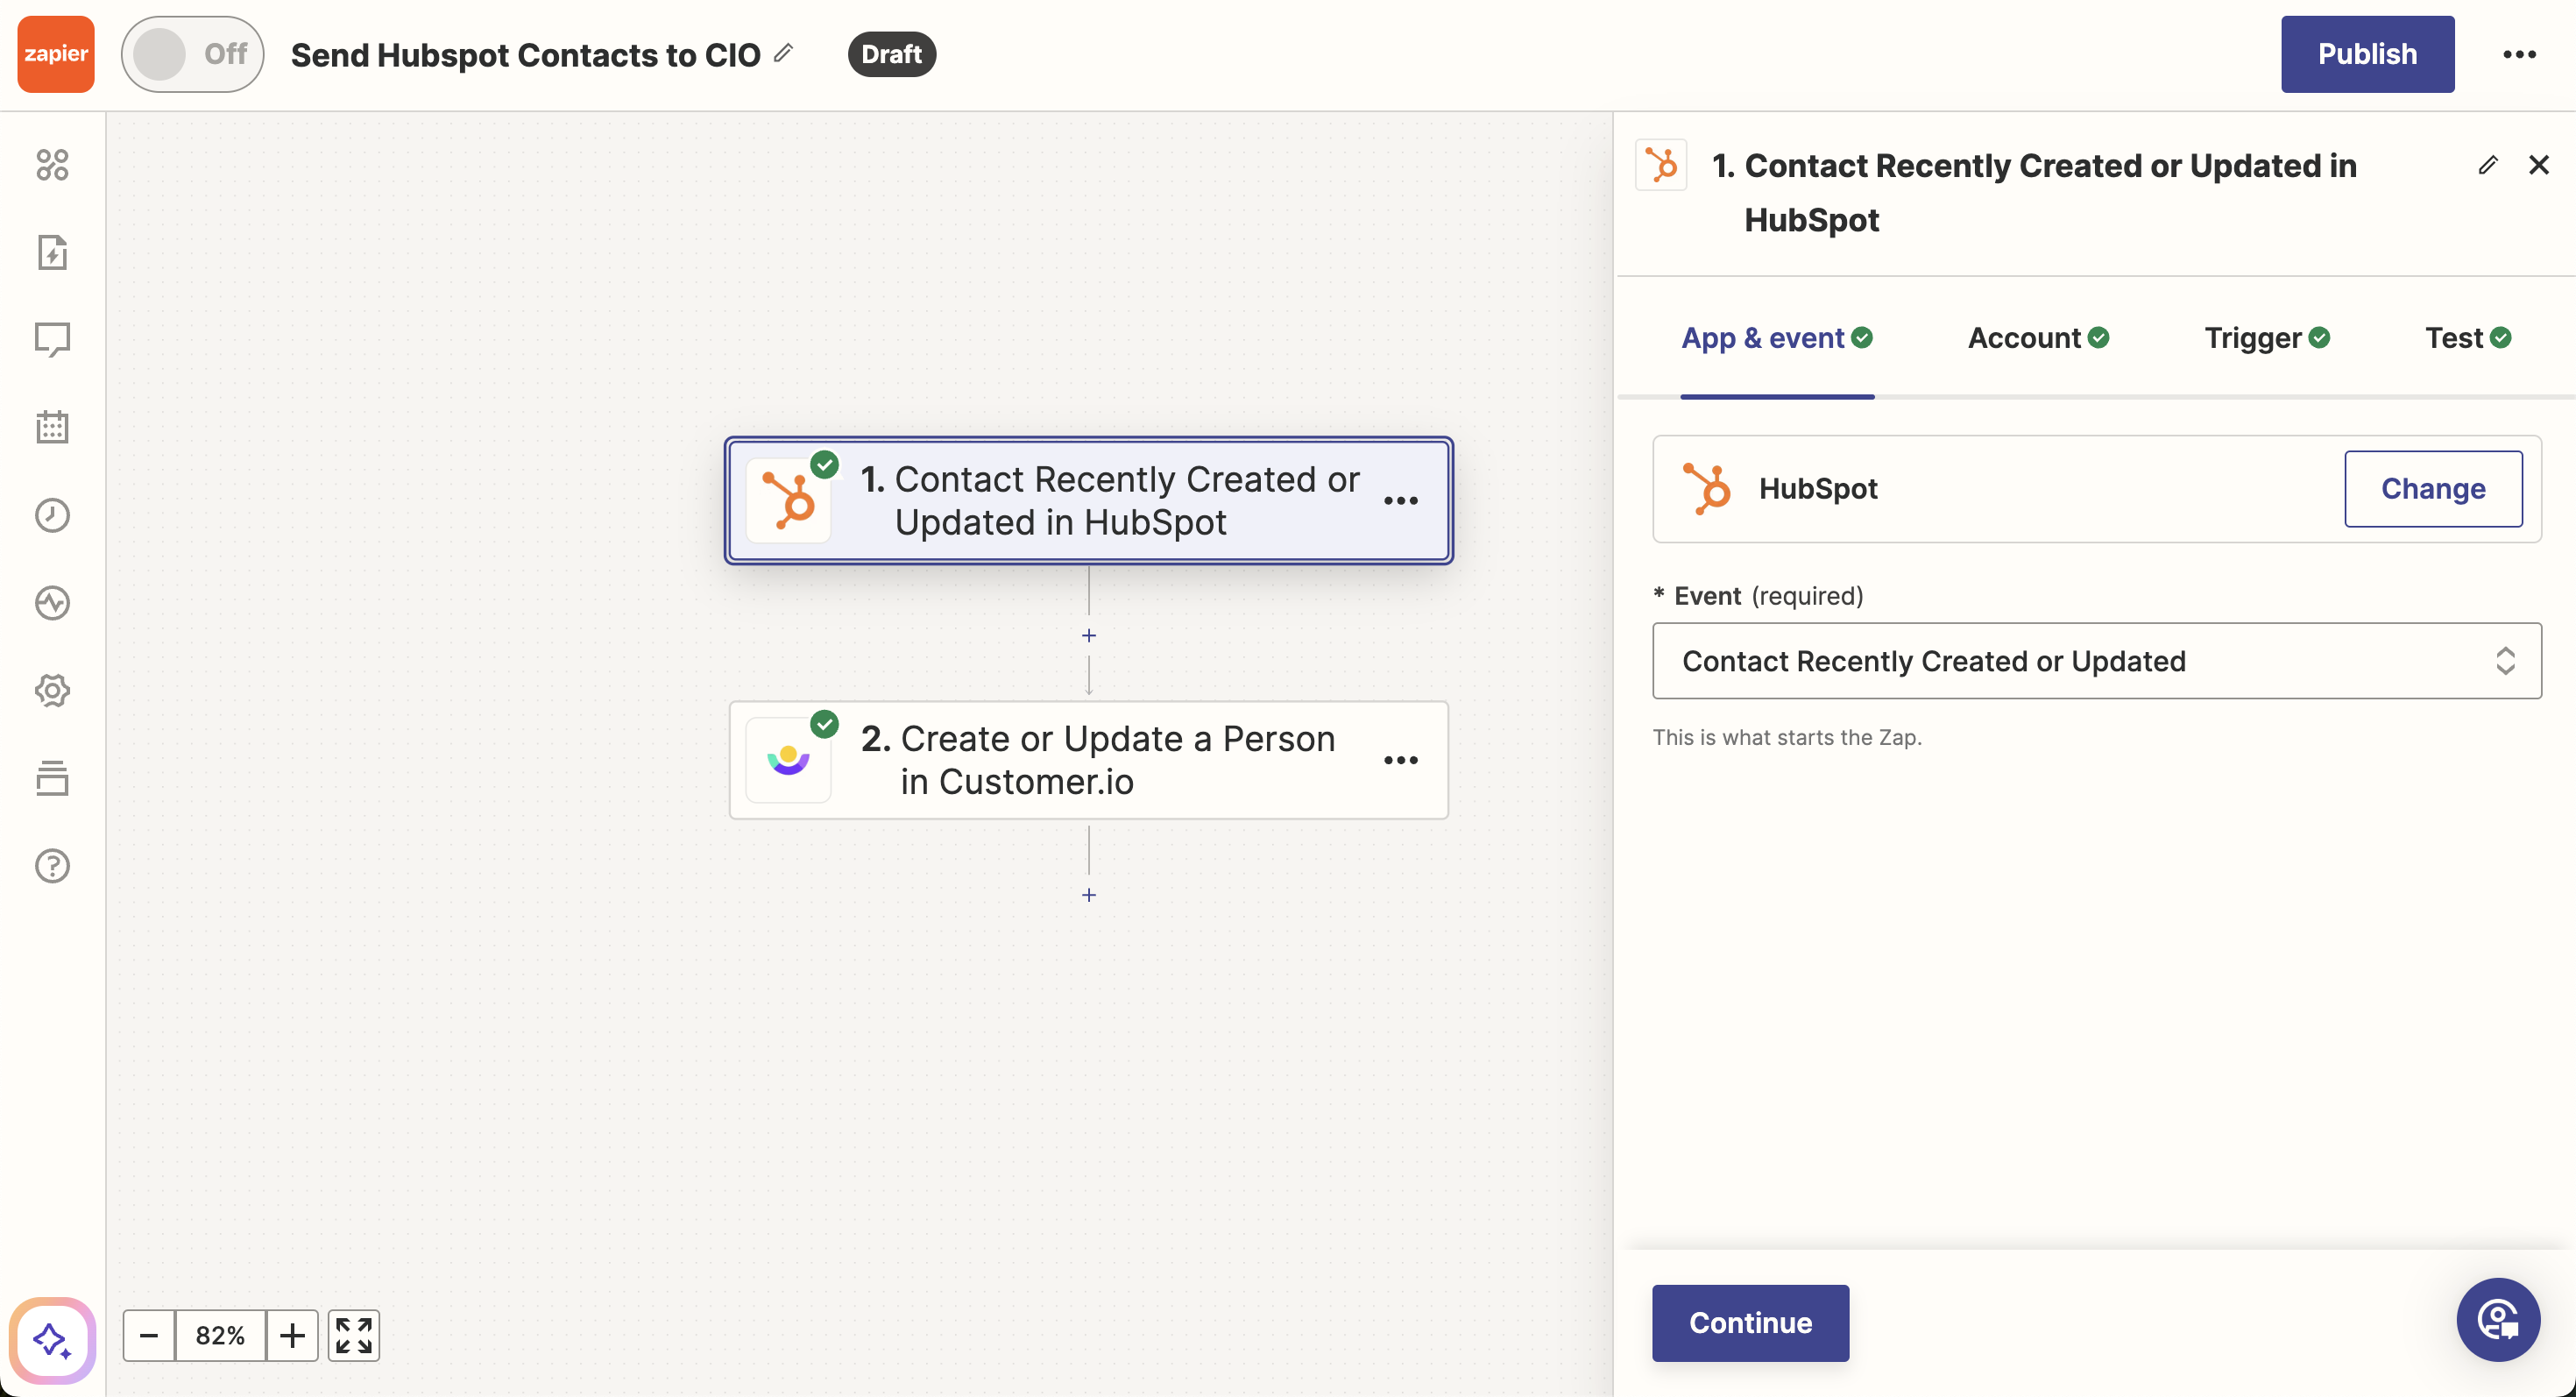
- Choose the event “Contact recently created or updated” or another event that meets your needs.
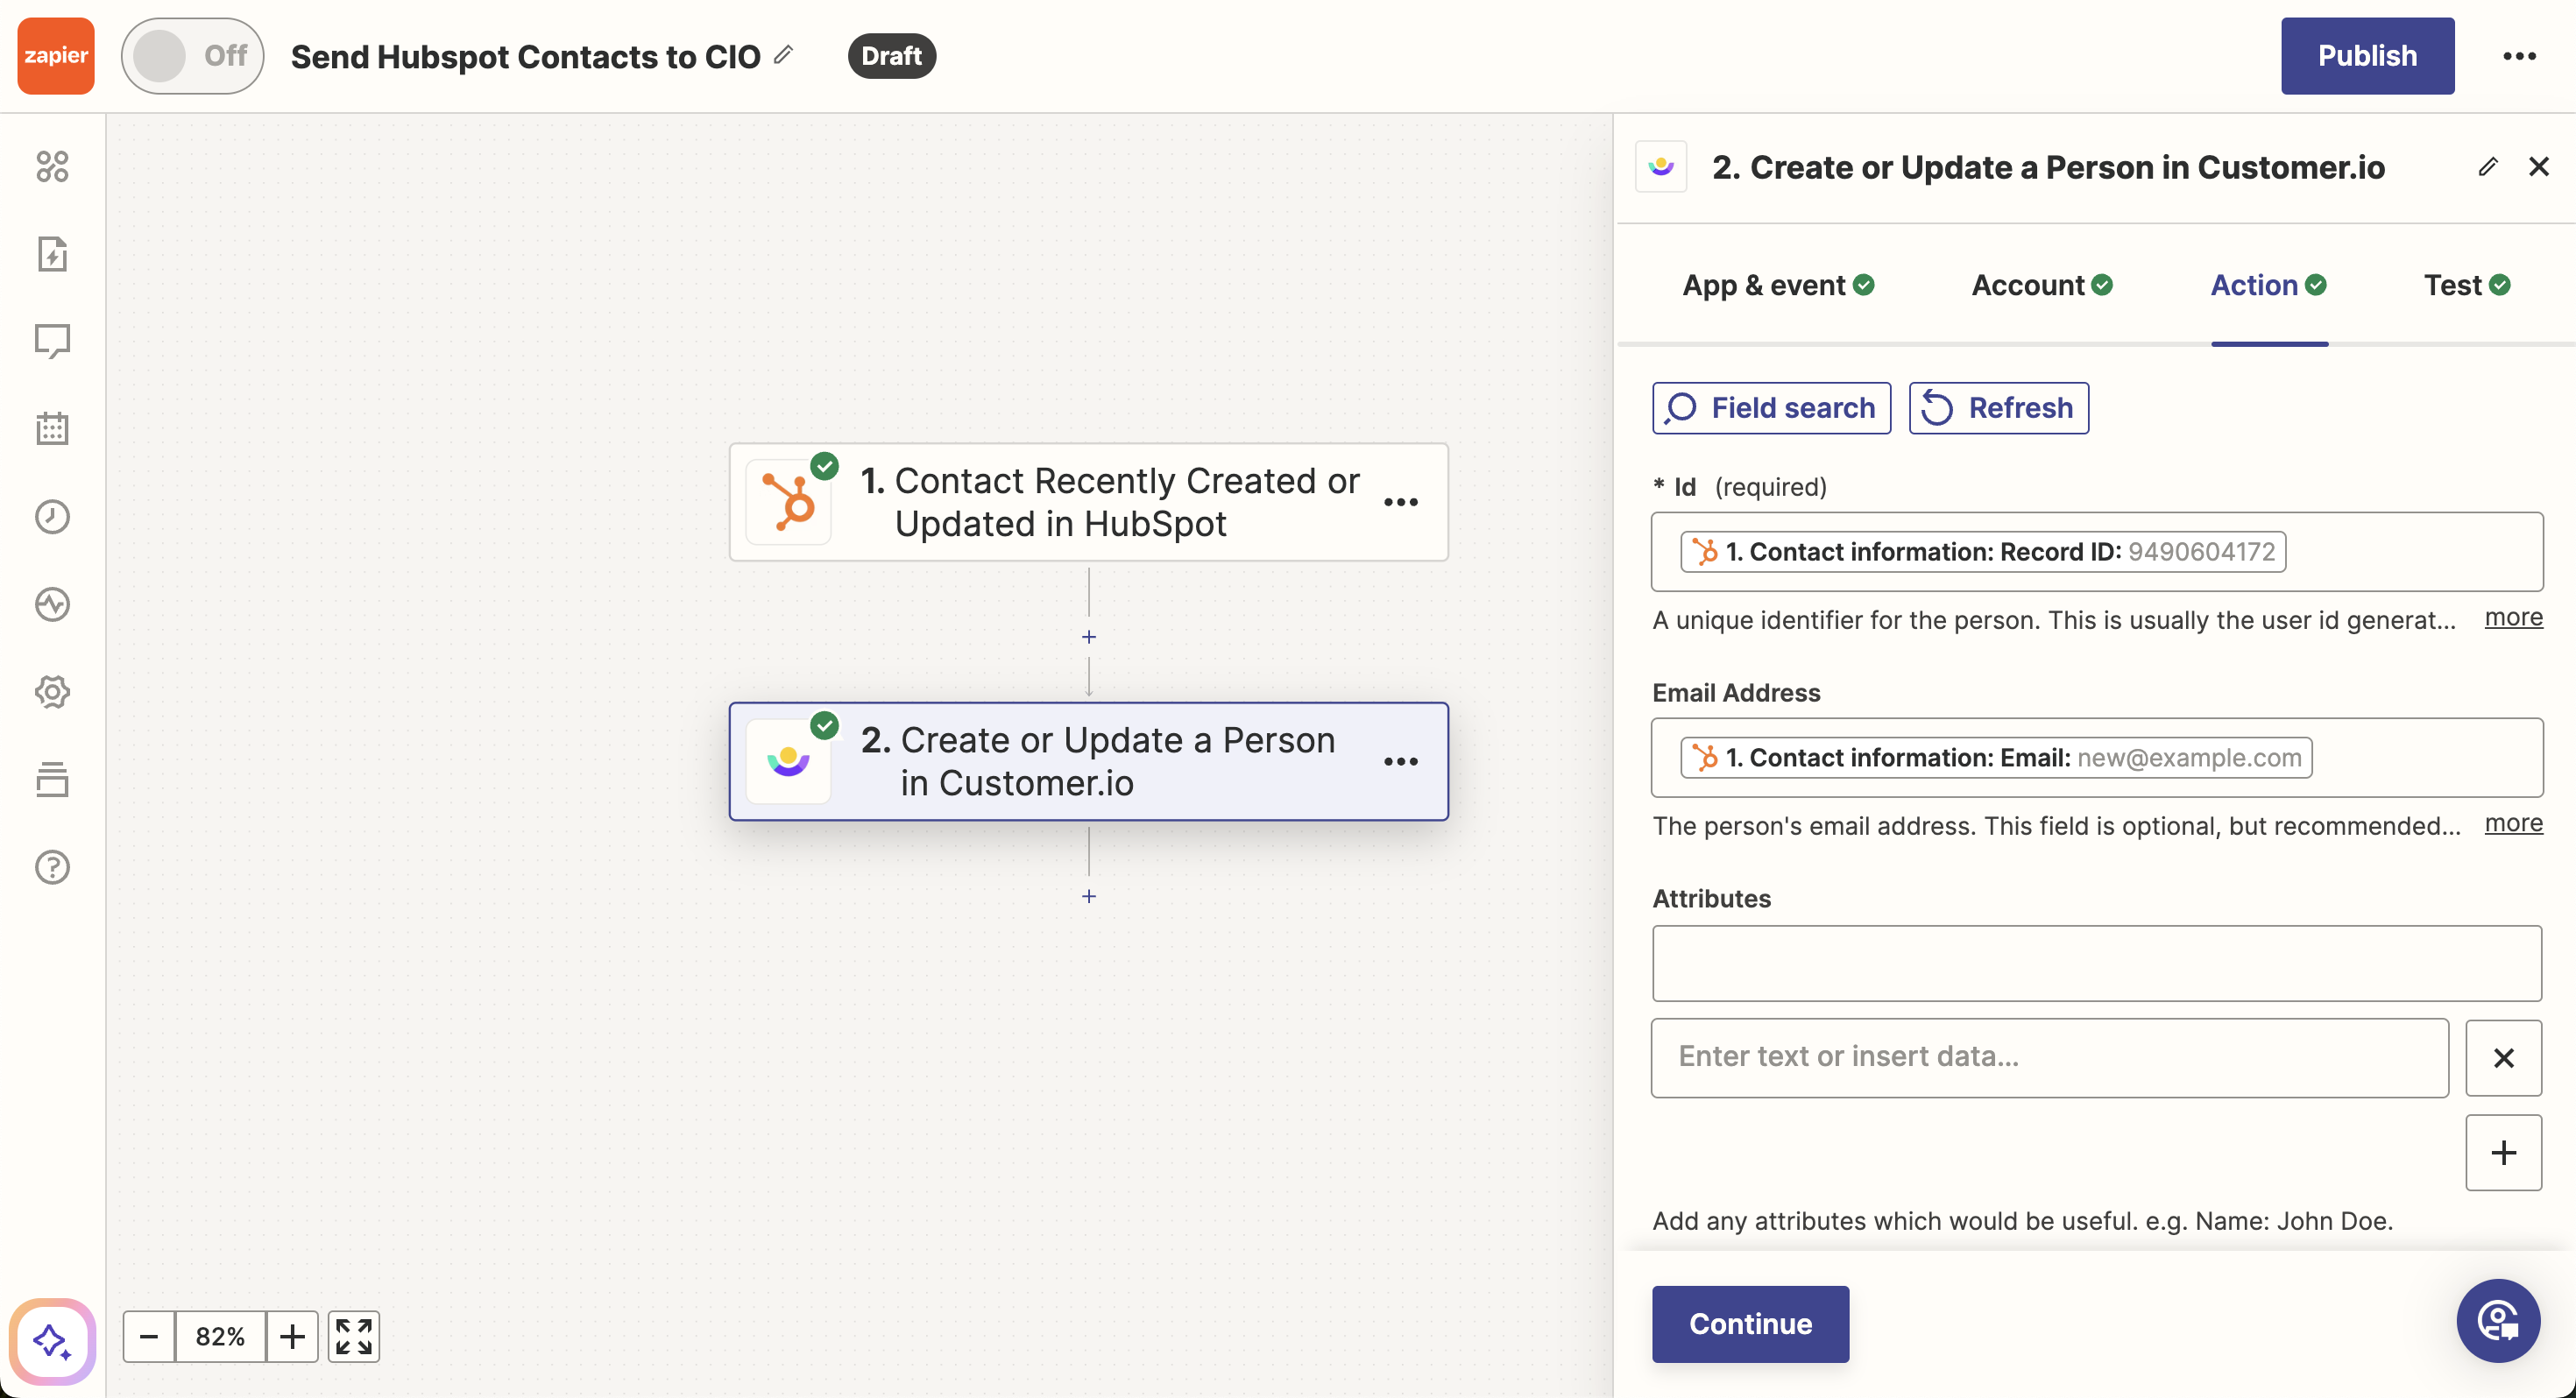
- Set your action as “Customer.io.”
- Add your Track API ID and Key from Workspace Settings in Customer.io. Make sure you copy the credentials from the workspace you want to integrate with.
- Choose the event “Create or update a person,” then map your fields to Customer.io.
- Click Publish when you’re ready to take the zap live!
- Keep in mind, Zapier has different pricing tiers for the number of tasks in your account.
Note, we count people towards billing. Review our best practices for keeping a clean workspace with only the people profiles you need month-to-month.
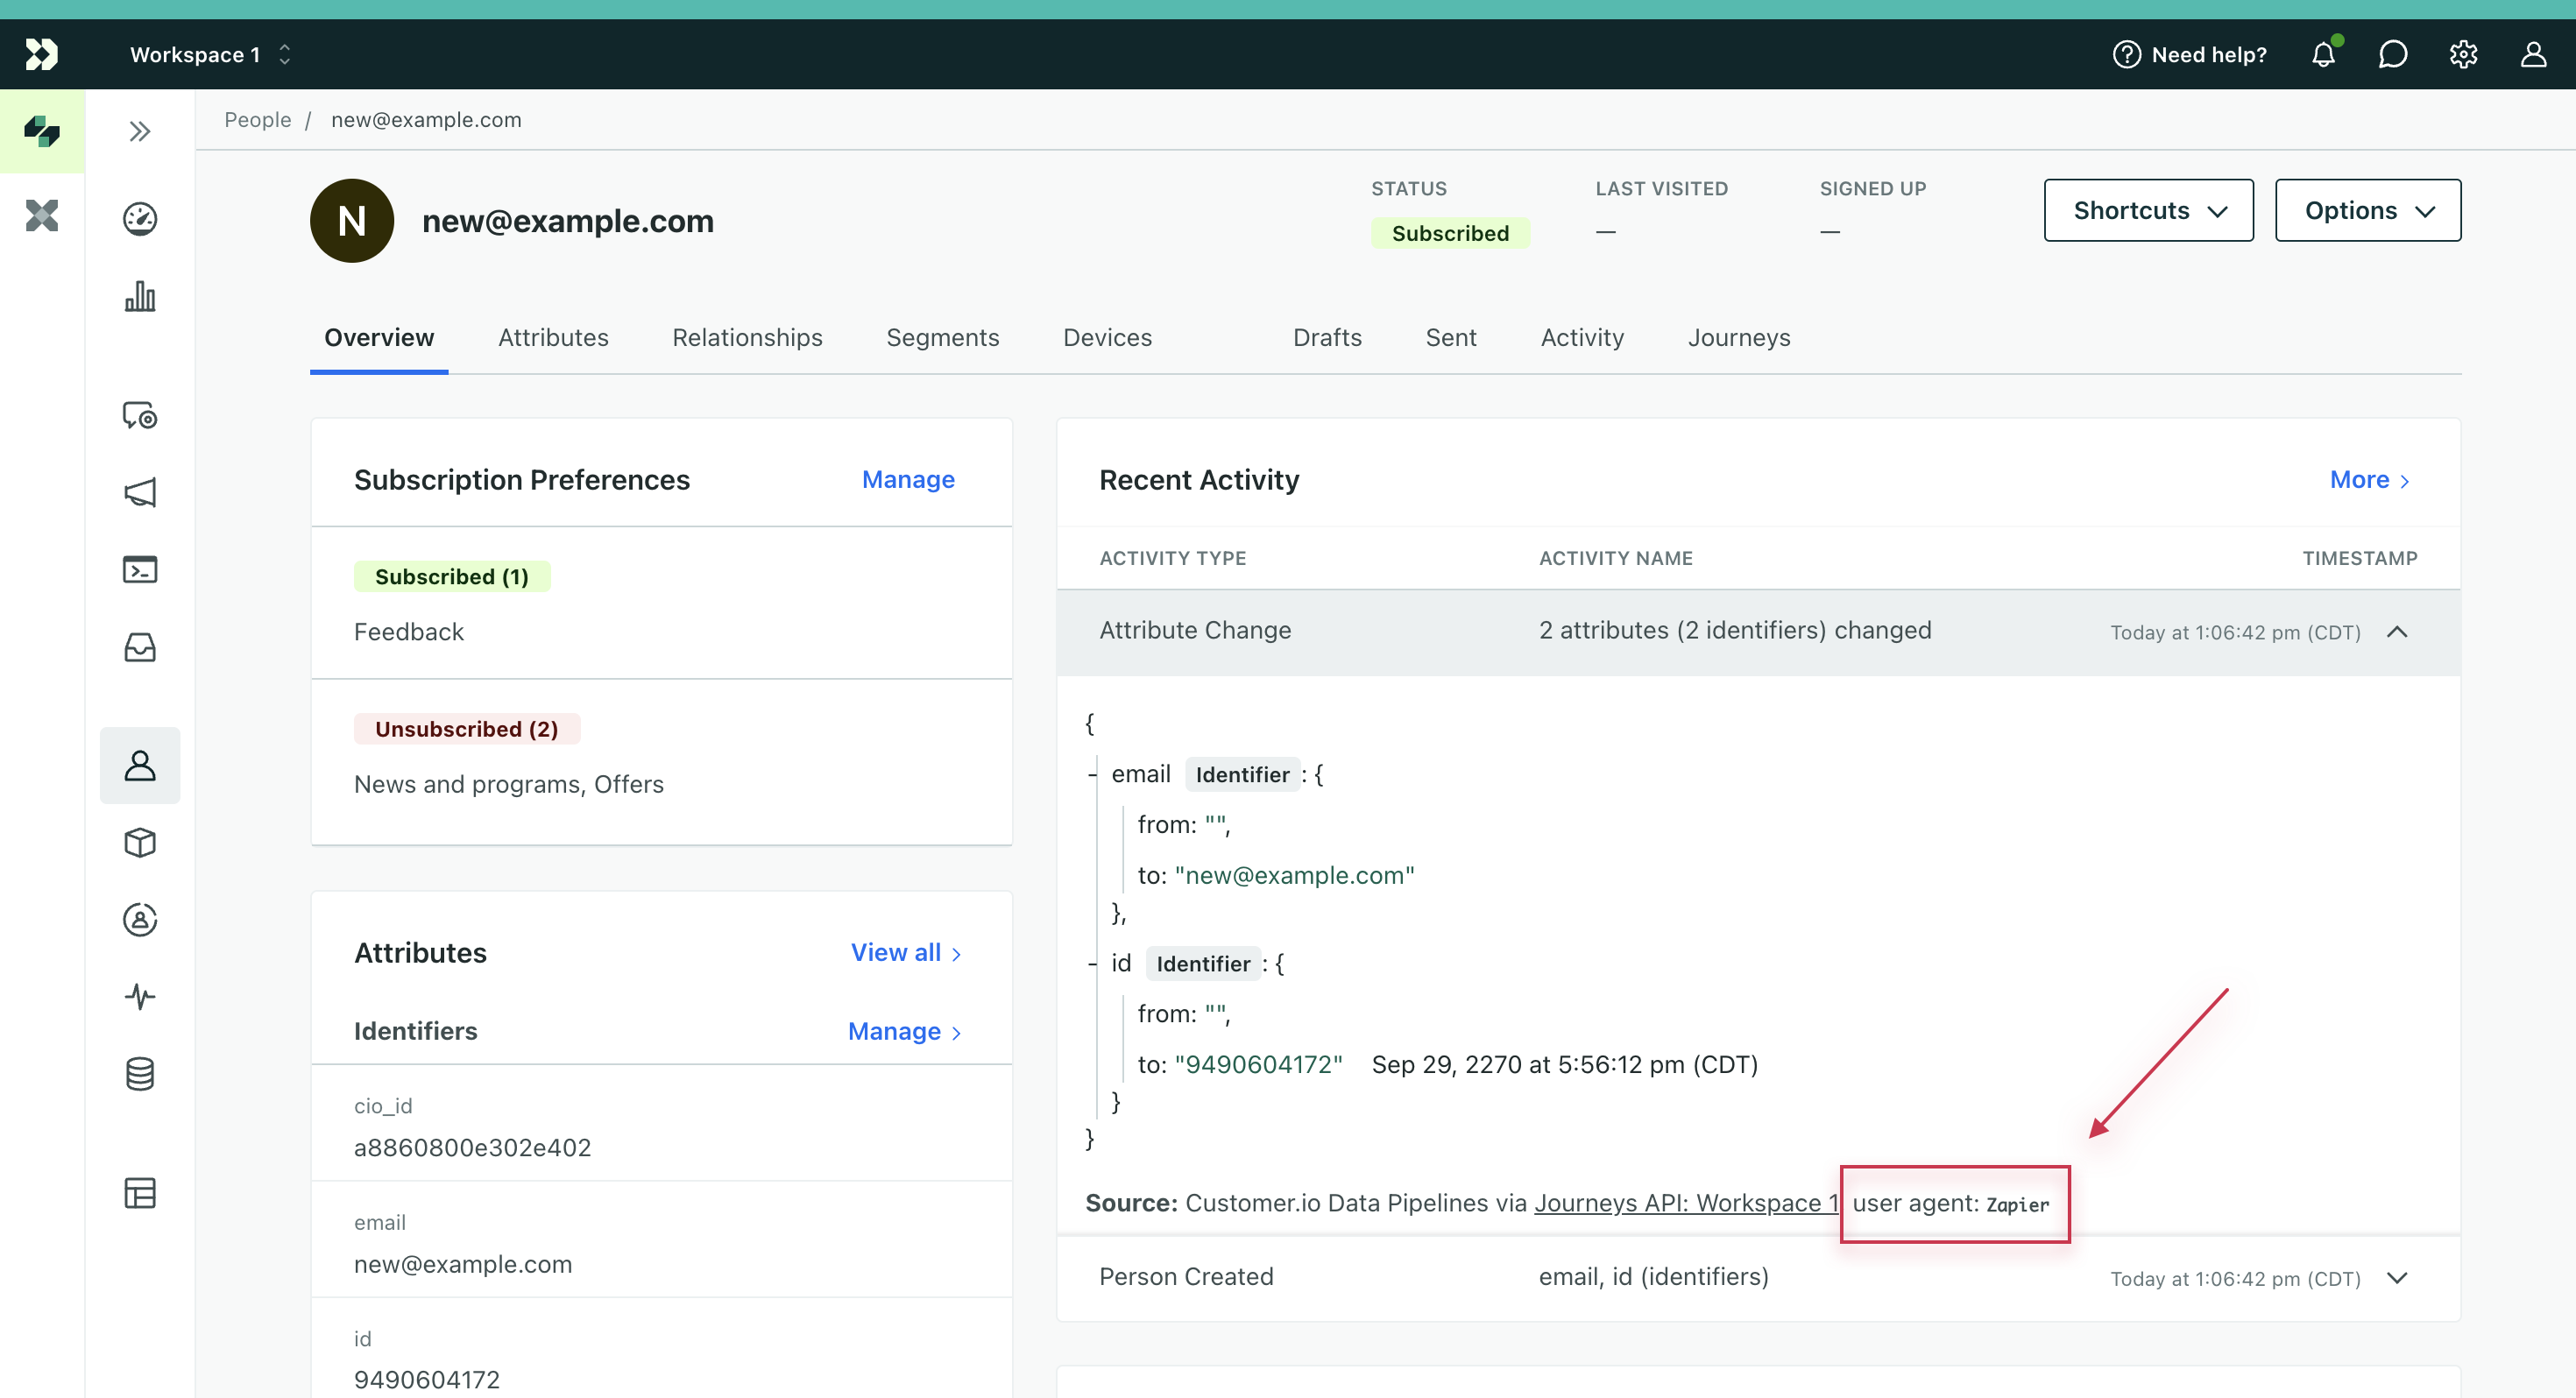
Moving forward, you will see “Zapier” in activity logs when the change came from your integration.